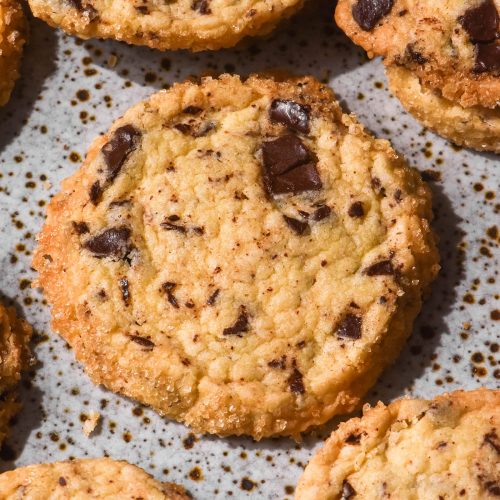
Gluten free choc chip shortbread
Gluten free, xanthan gum free, nut freeAny tablespoon measures are in Australian tablespoons. Dough can be halved for less shortbread, or you can freeze half the dough to bake at a later date.
Equipment
- 6cm (2.3 inch) circular cutter
Ingredients
For the choc chip shortbreads:
- 250 g salted butter at room temperature
- 125 g pure icing sugar, sieved (soft icing sugar contains tapioca flour, while pure is 100% sugar)
- 160 g fine white rice flour
- 120 g glutinous rice flour OR 60g glutinous rice flour and 60g gluten free cornflour OR 100g-160g cassava flour (see body of post and notes)
- Pinch of salt
- 1 teaspoon vanilla bean paste optional
- 5-20ml milk, only as necessary
- 100-150 g finely chopped chocolate
To finish (optional):
- 10-20ml (1-2 tablespoons) milk of choice, to roll the shortbread edges in
- 2-3 tablespoons finishing or granulated sugar, to roll the shortbread edges in
Instructions
- Preheat the oven to 170C/338F. Line two large baking trays with baking paper.
- Place the room temperature butter in the bowl of your stand mixer with the paddle attachment. Add the sieved icing sugar and beat on a medium high speed until pale, light and creamy. This can take as few as 3 minutes or as long as 20. Persist until you have the right texture – creamed butter is critical for airy, light shortbread. Scrape down the bowl as often as necessary. Keep in mind that you can also over cream here, which will cause your shortbread to spread. Not the end of the world, just something to keep in mind.
- Once the mixture is creamed to your liking, add the flours, salt and vanilla. Process on a slow speed to fully incorporate, then scrape down the sides and turn the mixer to high. If the mixture comes together in large balls without any liquid, don't add any more. If it doesn't, add a teaspoon at a time until it does.
- Take a small ball of mixture and roll it in your hands. If the balls crumbles and falls apart, you need to add more liquid. If it’s easy to roll, you’re good to go.
- Add the chocolate chips and place the mixer on low just to evenly distribute them.
- Scrape the dough into a rectangular piece of cling film and wrap. Press the dough down into a rectangle and chill for 30-60 minutes. Pressing the dough into a thinner rectangle helps it chill faster. NB: you can also divide the dough into two logs and refrigerate them this way if you would prefer to cut your shortbread from a log. See the body of the post for notes and comparisons of both methods.
- Choose which sort of shortbread you want to make: rolled out or cut from a log.
- To roll the shortbread out once chilled, cut half the dough and place it on a clean, dry and floured bench. I use tapioca flour for this purpose. Gently thump the dough down with your rolling pin to flatten it, then begin to roll. Keep picking the dough up as you roll to ensure it doesn't stick.
- Roll the dough to about 1/2 centimetre (0.19 inches or 1/5th of an inch) and use a circular cutter to cut out your shortbreads. How many you get will depend on the cutter you use. I get around 25 with a 6cm (2.3 inch) circular cutter.
- To cut the shortbread from logs, you will have refrigerated the two in two logs wrapped in cling film. Use a sharp, non-serrated knife to cut cookies about 1/2 centimetre (0.19 or 1/5th of an inch) thick.
- If you like, roll the edges of the shortbread in 10ml (1/2 tablespoon) milk and then in finishing sugar. This will give your shortbread sugary crusted edges which caramelise beautifully.
- Gently transfer the cut shortbread onto the lined baking tray. If you haven't floured the bench enough you might need to use a thin spatula to pick them up off the counter. If you're working in hot weather, refrigerate the dough as necessary and keep the cut shortbreads on their tray in the fridge as you work.
- Re-roll any extra pieces until you have used all the dough.
- Bake each tray for 20 minutes or until just lightly golden. They are more fragile as they cool so leave them on the tray to cool completely. Store leftovers in an airtight container.
Notes
- Gluten free flours can vary quite dramatically in their absorbency levels. I like to add 100g total starch to the bowl and go from there. I add the remainder if I need it and leave it out if I don’t.
- I recommend making these ahead of time in case they need to chill longer.
- I have found some variation in the need for liquid with these shortbread. Some need liquid, and don’t need liquid – in fact, they need to chill and firm up in the fridge. I’m testing whether this has anything to do with the butter type/brand or just the absorbency of the flours.
- Either way, be lead by your dough. If you need to add liquid, add it. If your dough is soft and batter like, spread it into a piece of cling film and refrigerate until hardened, 1-2 hours+ (weather dependent)
- I have found that the version with cassava flour has a bit of variance. In summer, I found it needs chilling – the dough is softer than other versions. It also needs 160+ cassava flour as opposed to 120g with other starch varieties. In winter, I found it didn’t really need chilling and only required 100g of cassava flour. I recommend weighing the extra 60g and keeping it in a separate bowl to add to your dough as necessary. A slightly too soft dough is better than a dough that is too dry.
- You can easily make a half batch of this recipe if you don’t need this many shortbread. Simply halve all the ingredient quantities.
Tried this recipe?Let us know how it was!