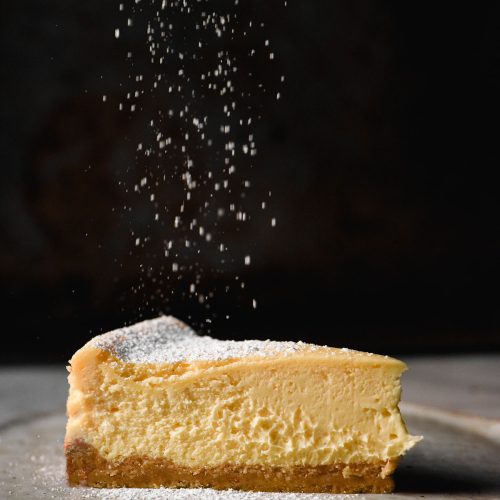
Gluten free cheesecake
Gluten free, nut free, low lactose option, low FODMAP optionI recommend making cheesecake the day before to ensure it has plenty of time to set in the fridge. This makes it easier to slice and gives it a lovely smooth texture.
Ingredients
For the gluten free base:
- 75 g toasted quinoa flour (see notes)
- 75 g fine white rice flour
- 3-5 g xanthan gum (see notes)
- Pinch of cinnamon
- 125 g softened butter (salted or unsalted)
- 100-125 g caster /superfine sugar
For the cheesecake mixture:
- 1 kg room temperature cream cheese (regular or lactose free, see notes)
- 250 ml (1 Australian cup)* double cream (see notes) (1 Australian cup is 250ml, the same as Canada and NZ. Use 1 cup + 1 tablespoon if you are American, 1 cup + 2 teaspoons if you are British)
- 275-375 g caster/superfine sugar (see notes)
- 4 large eggs (45-55g per egg, weighed out of shell)
- 1-2 teaspoons vanilla bean paste to your tastes
- Pinch of salt
- Squeeze of lemon juice (optional, to your tastes)
Instructions
To make the base:
- Preheat the oven to 170C/338F. Line a 24cm (9.5 inch) spring form pan – yes, the size is important. This recipe has been formulated with this size tin in mind.
- Whisk together the dry ingredients in a medium mixing bowl and set aside.
- Add the soft butter and sugar to another medium mixing bowl. Use a hand beater to cream the butter and sugar together until light in colour and fluffy looking. If you scrape a spatula through the butter, there should be no resistance and the butter should feel airy.
- Add the flour and use the beaters to just combine it. You should have a slightly sticky crumbly looking mixture. It will be look too sticky to roll or shape – this is the perfect consistency.
- Press the mixture into your lined spring form pan giving even coverage. Use a fork to poke plenty of air holes in the base to allow air to escape as it cooks.
- Place the cheesecake base in the oven for 20 minutes. It should be golden and puffy. Set aside to cool a little while you make the cream cheese component.
To make the cream cheese mixture:
- Place the room temperature cream cheese in your stand mixer with the paddle attachment. Process it on low for a few minutes to ensure it is smooth. Scrape the bowl down and be sure to get the centre of the bowl as it tends to clump up there. Add the cream or sour cream and process until combined.
- Add the sugar and allow to process for a few more minutes to ensure the sugar is dissolved. Scrape down the bowl then add the eggs, one by one. Scrape down the bowl again to ensure there are no clumps of cream cheese.
- Finally, add the flavourings you are using (vanilla and optional pinch of salt/lemon juice) and process to combine.
- Pour the cheesecake mixture onto the baked base. Gently bang the pan against the counter a few times to smooth out the surface and encourage any air to the top.
- Place the cheesecake on a sturdy baking sheet and into the oven. Turn the oven down to 160C/320F. Bake for 45-50 minutes until puffy and cooked around the outsides but jiggly in the middle. The top should ideally remain pale.
- When the cheesecake is cooked, turn off the oven and leave the door ajar. Allow the cheesecake to sit in the oven for 15-20 minutes like this.
- Take the cheesecake out of the oven and carefully run a knife around the edge. This will help ensure it doesn’t crack as it cools (sometimes the cracking is caused by the edge pieces being stuck to the pan).
- Allow the cheesecake to cool before transferring to the fridge. I always recommend making cheesecake the night before so it has time to properly cool and set. This results in a gorgeously soft and creamy centre that remains easy to slice.
Notes
- Toasted quinoa flour is what creates the Graham cracker like flavour here. It is not optional and can’t be substituted.
- I grind whole quite quinoa to flour in my Nutribullet and then toast it over a low heat, stirring constantly. It should be a medium brown colour and smell deliciously nutty.
- I have added xanthan gum to the base because there is already xanthan gum in store bought cream cheese. I haven’t tested it without xanthan gum, but there is a version of this recipe in Intolerance Friendly Kitchen that is xanthan gum free.
- Make sure you don’t buy gritty or stale white rice flour or you will absolutely taste it. Australians: don’t buy the stuff in the box at the supermarket.
- If you need the cheesecake to be lactose free, I recommend using lactase drops in regular, full fat double cream. The lactose free versions of these products are often ‘light’ and don’t contribute enough richness to a good cheesecake.
- I can't overstate how much variation in added sugar I have seen when it comes to cheesecake recipes. I've seen recipes with similar ingredient ratios to this one have anywhere from 250-400g sugar (and they were all well reviewed). Sugar in a cheesecake seems to be quite subjective and based on where you live. This is why I have given an option for how much to add.
- Lactose free dairy products taste sweeter than regular dairy. This is a result of the lactase enzyme converting the lactose to glucose and galactose. If you use lactose free cream cheese and cream, use a lesser amount of sugar.
- If you’re not sure how much sugar you prefer, taste the mixture before you add the eggs. You can add the flavourings before the eggs to give yourself a sense of the final flavour.
Tried this recipe?Let us know how it was!