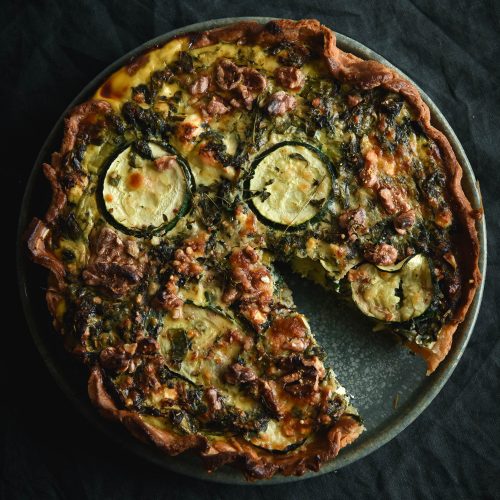
Gluten free yoghurt pastry
Nut free, FODMAP friendly, gum free, starch free option, low lactose option Makes enough pastry for one 25cm (10 inch) pie crust
Equipment
- 1 x 25cm (10 inch) pie dish
Ingredients
- 160 g (1 cup) fine white rice flour
- 60 g (1/2 cup) tapioca flour (see notes)
- 1 teaspoon fine salt or 3-4 tablespoons icing sugar
- 2 teaspoons psyllium husk powder or 1 tablespoon psyllium husks
- 125 g butter cold and cubed
- 75 g full fat Greek or plain lactose free yoghurt (see notes)
- Ice water to bring the dough together I needed 1/4 cup - 60ml
Instructions
- To make the pastry:
- Combine the flours, salt and psyllium husk in a large mixing bowl. Add the cold cubes of butter, and use your fingers to rub the butter into the flour until only small bits remain. It should resemble a course meal.
- Stir in the yoghurt, then get your hands in and distribute it evenly. Add the water – just enough to form a smooth dough with no dry bits on the bottom of the bowl. Use the least possible amount of water to achieve this – drier pastry equals crispy, flaky pastry. Bring the dough together into a ball.
- Lightly flour a sheet of baking paper with tapioca flour. Roll the dough out into a large rectangle – about 3-4 centimetres wider than the lip of the pie dish. Patch up any cracks as they appear. The dough should be about 1/2 centimetre thick.
- Place your pie dish in the centre of the dough. Slide one hand under the baking paper and into the centre of the dish. Use the other hand to hold the dish. Flip the dish over and let the pastry fall into it. Be generous in letting the hanging parts of pastry fall into the dish or it will break.
- Patch up any cracks and press the pastry firm up against the sides of the dish. Trim the overhanging edges with scissors and neaten them up or crimp them as you see fit. Use a fork to poke some air holes in the pie base and pop it in the fridge to chill.
- To blind bake the pastry: (optional, see the intro)
- Prepare the pastry as per the instructions. Allow it to chill in the fridge while you preheat the oven to 180C/356F.
- Scrunch up a large piece of baking paper, open it up and place it on top of the pastry. Smooth it out so that the pie weights will fit flush up against the pastry. Add the pie weights and place in the oven for 30 minutes.
- Gently remove the pie weights and paper from the pie. Dock the pastry again if the holes have closed up. Brush the pastry base and sides with egg wash, then return to the oven for 10 minutes.
- You can fill the pastry while hot depending on what you are baking. Any eggs in the filling will start to cook, so keep that in mind. Return the tart to the oven for 30 minutes or until the tart is cooked through. You might need to gently cover the crust tops with foil to stop them overcooking. You can also cook the tart for longer on a lower temperature to prevent this.
Notes
Wetter pies like a strawberry pie will need a base that has been par baked. For drier fillings, like my spanakopita tart, you can get away with filling the tart raw. I personally like the taste of a par baked tart better, but it does save a lot of time to use a raw base.
If you're intending to do any lattice work for the top of the pie, I recommend letting the base cool completely first. Trying to do latticing while your pastry is melting is a nightmare, I promise.
Any offcuts or leftovers make for delicious, crunchy crackers or biscuits.
See the section on flours for some notes on making a starch free version.
Tried this recipe?Let us know how it was!