Easy gluten free chocolate cake
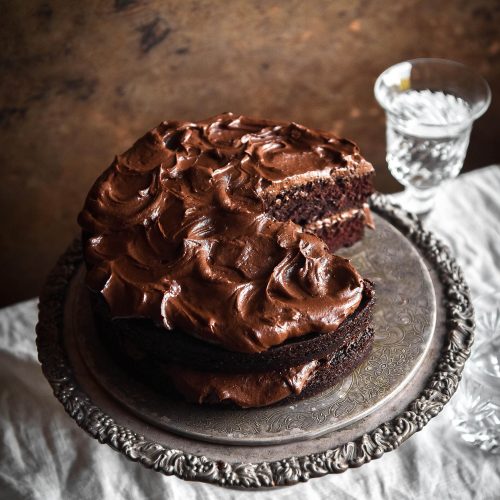
Gluten free, nut free, easily made dairy free, FODMAP friendly• This recipe makes enough for a 2 layer cake (as in the picture on this recipe card). If you want a double cake, as in some of the other photos, make a double quantity of both the cake and icing. I mix them up separately. • The icing quantity is enough for a naked cake with a reasonably thin layer of icing between each cake. If you prefer a thick layer of icing, you can halve again or even double the icing mixture. *Cups and measures are in Australian cups and measures. Use gram weights and ml for international accuracy. 1 Australian tablespoon = 4 American, Canadian and New Zealand teaspoons.1 Australian tablespoon = 3 1/2 British teaspoons
Ingredients
Dy ingredients for the cake (makes 2 x 20cm cakes)
- 1 cup* (220g) caster sugar
- 1/2 cup* (50g) light brown sugar
- 1 1/4 cup* (210g) fine white rice flour
- 3/4 cup* (75g) dutch processed cocoa powder
- 8g (2 teaspoons) baking powder
- 1 teaspoon baking soda
- 1 1/4 teaspoon salt (I used table)
Wet ingredients for the cake:
- 250ml (1 cup)* milk of choice (I tested full cream lactose free and soy)
- 1 tablespoon* apple cider vinegar (see substitution notes)
- 180ml (3/4 cup)* (180ml) vegetable oil (see substitution notes)
- 60ml (3 tablespoons)* fresh espresso (see substitution notes)
- 2 teaspoons vanilla bean paste (see substitution notes)
- 2 extra large eggs (45-55g each, weighed out of shell)
- 250ml (1 cup)* boiling water
For the buttercream:
- 185 g butter
- 1 1/2 cups of icing sugar
- 3/4 cup of cocoa
- 125ml (1/2 cup)* of milk
- 1/2 teaspoon vanilla bean paste (optional)
- Pinch of fine salt
Instructions
To make the cake:
- Preheat the oven to 180 degrees Celsius or 356 Fahrenheit. Grease and line two 20cm baking pans.
- In a large bowl, weigh out all your dry ingredients (do it!) and whisk together until they become a lovely chocolate brown.
- Mix the milk with the apple cider vinegar and allow to sit for a few minutes. This will form a buttermilk. It might not curdle dramatically but the buttermilk will assist in flavour development, leavening and general fluffiness.
- Add all the wet ingredients except the boiling water to the dry. Continue whisking until a smooth batter has formed. It will look moist enough to go into the oven and you might think you don’t need the water. You do! It blooms the cocoa, developing the chocolate flavour. It also creates a beautifully fluffy cake.
- Add the boiling water and whisk to combine. Pour the mixture into the prepared cake tins and bake for 30-40 minutes or until cooked through.
To make the icing:
- Place the butter in a small saucepan and brown very well over a low-medium heat. If you haven’t browned butter before, see the notes section for some handy links.
- Once browned, pour the butter into a silicon cake tin and place in the fridge or freezer to set. It will take about 15-20 minutes in the freezer.
- Once the butter is completely cooled, break it up and place it in the bowl of your stand mixer. Beat the butter with the whisk attachment until it is light and fluffy, scraping down the sides as necessary. Don’t be fooled – this isn’t a quick process. It will take about 10-15 minutes of beating and scraping down. The mixture should be light and fluffy – not quite white but a very pale beige.
- While this is happening, sieve the icing sugar and the cocoa together. I hate sieving so I wouldn’t instruct you to do this unless it was totally necessary for a smooth icing, I promise.
- When the butter is ready, turn the speed to low and mix in the icing sugar mixture and the milk. It might form a cloud of icing if you go too quickly. Add the salt and vanilla bean paste (stop the machine to add vanilla or it gets tangled in the beaters) and mix until combined. Taste and adjust if necessary.
To assemble:
- Once the cake has completely cooled, it’s time for icing! You can either plonk it all on top or carefully slice the cake in half to ice between each layer. The recipe makes enough icing for a reasonably thin layer between each piece. As the notes suggest, halve it again or even double it if you’re a very thick icing kinda person.
- Use an offset spatula or a flat edged knife the spread the icing over the cake. I find it helps to dip your knife in boiling water and dry it off before icing the crummy sections of the cake. The heat makes the knife glide over the top and avoids picking up too many crumbs.
- While it’s tempting to keep fiddling with the icing all day, simple is best. Get in there, ice it with confidence and move on, you know?
- This cake keeps well in the fridge for a few days.
Tried this recipe?Let us know how it was!