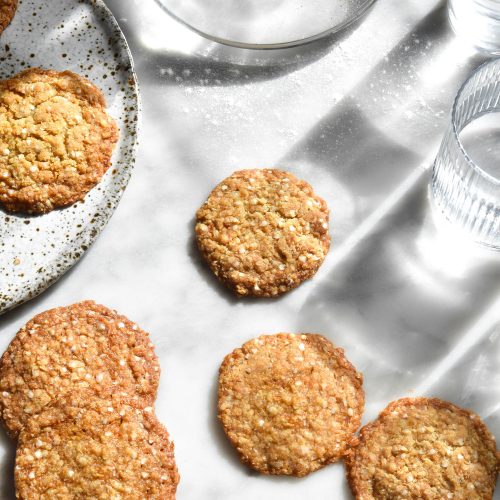
Gluten free ANZAC biscuits (FODMAP friendly)
Gluten free, nut free, low lactose
Ingredients
- 75 g white rice flour
- 30 g tapioca flour
- 50 g (3/4 cup) desiccated coconut
- 60 g brown sugar
- 20 g caster sugar
- 65 g (1 cup) quinoa flakes
- 100 g butter
- 2 tablespoons rice malt syrup
- 3/4 teaspoon baking soda
Instructions
- Preheat the oven to 150C or 302F and line 2 baking sheets with baking paper.
- In a large mixing bowl, weigh out all the dry ingredients except for the baking soda. Get your hands in to break up all the brown sugar bits and create a uniform mixture.
- Melt the butter in a small saucepan over a low heat. Once it has completely melted, add the rice malt syrup and stir to combine. For accurate measurement, it can be helpful to very lightly grease your tablespoon measure to help the rice malt syrup slide off.
- Once the rice malt syrup has been added and the mixture is bubbling away, add the baking soda. It should slowly start to bubble up – leave it until it reaches a peak and then stays at the same height. It won’t explode over the pan, it will probably only reach halfway.
- Pour the bubbling mixture straight into the dry ingredients and stir to combine. You’ll probably get 3/4 of the way there with a spoon – then use your hands to finish the job. The mixture will look crumbly and not like a cookie dough. It might look a tiny bit dry and that’s OK.
- Use your hands to squish the mixture into 10 even size balls. You’ll need to use a bit of pressure to bring them together. If you absolutely can’t get them to form a ball, add a scant teaspoon of water and try again. Don’t just panic at the crumbly mixture and add water for the sake of it. I find this version of ANZAC biscuits get soggy quite quickly when water is added.
- You will need to form all the balls straight away, otherwise the mixture will dry up and it will be too difficult. Place them, with room for spread, on the lined oven trays. Use your hand to gently press each ball down about 1/3 of the way. Keep in mind that they’re easy to press down once cooked (but not so easy to build them back up) so it’s best to err on the side of caution here.
- Use your hands to coax the pushed down balls back into a circular shape, patching up any cracks around the edges.
- Place the trays in the oven for 6 or 7 minutes, before rotating to account for hotspots in your oven. By the halfway mark, the biscuits should have started to ‘melt’ while still looking a little bulbous.
- Continue to cook for 6 or 7 minutes or until golden brown and done to your liking.
- While the biscuits are hot, use your hands or a knife to gently perfect them into circles. You can also gently press down on the tops if they’re a little puffy.
- Allow the ANZAC biscuits to cool COMPLETELY on the tray. Otherwise they will break apart and have oily bottoms.
- Store in an airtight container to avoid the dreaded sog. Legend has it (obviously) that they will keep for months.
Tried this recipe?Let us know how it was!