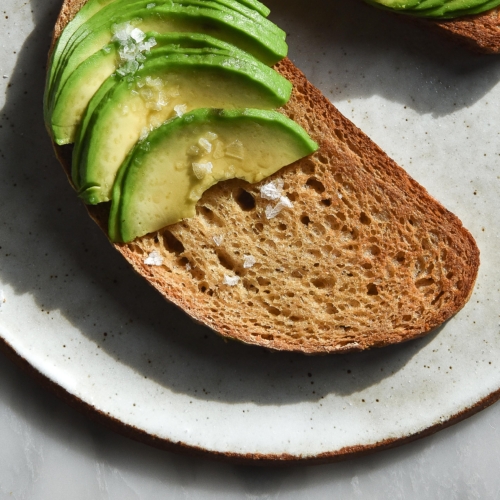
Gluten free sourdough bread
Vegan, gluten free, FODMAP friendly, gum free*Cups and measures are in Australian cups and measures. Use gram and ml for international accuracy.
Equipment
- Large glass or plastic mixing bowls
- Boule shaped Banneton (bread shaping basket) or a bowl with a clean tea towel
- Lame (scoring blade) or sharp knife
- Dutch oven or cast iron skillet and tin foil
- Ice cubes, optional
Ingredients
For the pre-ferment:
- 125-150 g (1/2 cup)* active sourdough starter (see notes above and here) Use 150g for a more sour loaf (I use 150g)
- 60 g (1/2 cup)* white rice flour
- 150 g (3/4 cup)* water
For the loaf:
- 20 g (just over 1/4 cup)* psyllium husk, not psyllium husk powder
- 250-275 g (1 1/4 cups)* water
- 1/2 tablespoon honey or sugar
- 1 1/2 teaspoons sea salt
- 55 g (1/2 cup)* quinoa flour
- 100 g (1 cup)* sorghum flour
- 75 g (3/4 cup)* tapioca flour
- 60 g (1/2 cup* white rice flour
Instructions
To make the pre-ferment:
- Firstly, ensure you’re using a starter that has been fed a few hours before. It should be on the rise and have a domed top when you measure it into the bowl. To fit this around a normal work schedule, I’d suggest feeding your starter at 5.30pm, and then waiting until bedtime (or the peak of your starter) to make the pre-ferment.
- Once the starter is ready to go, mix it with the water and then add the flour. Stir until combined and cover with cling film or a wrap. I hate recommending cling film but it does do a good job here.
- Leave this in a reasonably warm, draft free place overnight. I use my oven with just the light, not the heat turned on.
To make the loaf:
- In a medium sized mixing bowl, combine the psyllium husk, water, honey and salt. Whisk to combine, and then leave for 5-10 minutes to thicken into a gel.
- While you’re waiting, combine the flours in a large glass or plastic mixing bowl.
- Once the psyllium gel has thickened, mix the pre-ferment into it and whisk to combine. Add this wet mixture to the flours and use a spoon to combine the mixture as much as possible. Once it’s almost mixed, use your hands to squelch the dough around, picking up dry bits of flour as you go. If you’ve weighed everything diligently there shouldn’t be a need for extra water, but you can add 1-2 tablespoons if it’s truly truly necessary. You should be able to pick up the dough and shape it.
- Once the dough is completely mixed through and formed into a rough ball, tip it onto a very lightly (white rice) floured bench. Use your hands (and the Youtube links above) to close any seams as much as possible. Make sure the side with no seams is the top of your loaf.
- When the dough is shaped, lightly flour your banneton or bowl with white rice flour. Place the nice side of the dough (aka the side with no seams that you’ve chosen as the top of the loaf) down into the banneton. The base of the loaf (with all the seams) should be facing upwards now.
- Cover the loaf with a lightly oiled showercap or the cling you used for the pre-ferment. Place the loaf in a warm, draft free place (again, I use my oven with just the light on) for 2-3 hours, or until it’s a little jiggly and a finger poke springs back halfway.
To bake the loaf:
- Half an hour or so before baking the loaf, place your dutch oven in the oven get the heat up to 250C or 500F. Making sure the dutch oven is very hot is integral to getting oven spring.
- When the oven and loaf are both ready, take a long piece of baking paper and lay it on the bench. It needs to be long enough that you can lower the loaf into the dutch oven without burning your arms. In my experience, dropping the loaf into the dutch oven results in a flat and gummy loaf.
- Invert the loaf onto the centre of the baking paper, leaving the edges for lowering handles. Use a lame (sharp scoring blade) or a sharp knife to make a reasonably deep incision in the loaf. Google ‘bread scoring’ for some pattern ideas, or just keep it simple.
- Get all your oven gear ready to work quickly for this next step. Carefully and quickly remove the super hot dutch oven from the oven. Shut the oven door while you work. Take the lid off and quickly lower in the bread. If you’re using an ice cube for extra oven spring, add it now. Pop the lid back on and quickly return the dutch oven to the oven. Turn the oven down to 200-220c.
- Bake the loaf with the lid on for 40-50 minutes. If you prefer a less caramelised (aka dark) crust, leave the lid on a little longer. Once the time is up, remove the lid and continue to bake your loaf for another 40 or so minutes, or until the crust sounds hollow when you knock on it and is deeply caramelised brown in colour.
- Once cooked, remove the loaf from the oven and baking paper and place it on a cooling rack. Allow to cool completely (3-4 hours AT LEAST) before slicing into it, as you can compress all the air in the loaf and end up with extremely gummy bread.
- You can store the loaf in a bag or freeze it in slices.
Notes
- My cup measurements use Australian cups. I suggest you use the gram measurements for accuracy, particularly if you don't use Australian cups.