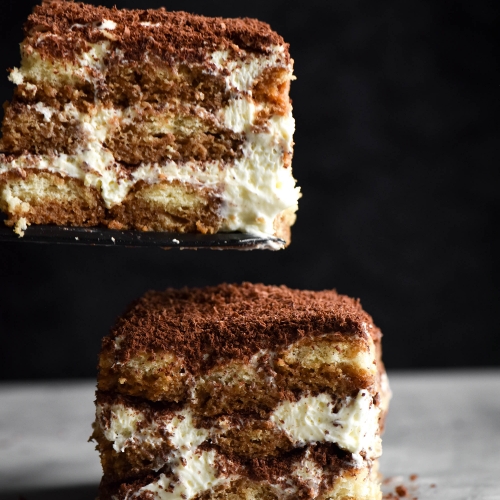
Gluten free, lactose free and FODMAP friendly Tiramisu
Serves 6-8
Ingredients
For the lactose free mascarpone: (see introduction for options)
- 2 X 250 ml tubs of lactose free cream
- 20ml (1 tablespoon) lemon juice
For the savoiardi (makes about 60 biscuits, you may have some leftover but it’s better than not having enough)
- 5 extra large eggs, separated 40-55g per egg, weighed out of shell
- 220g (1 cup)* (220g) caster sugar
- 2 teaspoons vanilla bean paste
- 120g (3/4 cup)* (120g) fine white rice flour
- 190g (1 1/2 cups)* tapioca flour
For the coffee liquor mixture:
- 100ml fresh espresso
- 100ml Kahlua
- 40ml (2 tablespoons) (40ml) white rum I used Bacardi
- 180ml (3/4 cup)* water
For the cream mixture:
- 2 X 250 ml tubs of lactose free cream
- 60g (1/3 cup)* icing sugar
- The mascarpone that we made or purchased
To assemble:
- 50 g+ dark chocolate use 70% or above to keep the recipe lactose free
Instructions
To make the lactose free mascarpone:
- Place the 2 X 250ml tubs of cream in a saucepan and place over a low medium heat. Stir intermittently. Once the cream starts to bubble, allow it to cook for a couple more minutes before adding the lemon juice. Allow to cook for a couple more minutes.
- The mixture should be a little gritty and thicker than when you poured the cream into the pot. This is less of a dramatic change when using lactose free cream, I find. I also found that this was pretty hard to mess up – if the mixture is a little undercooked, more whey drains off and all is well. Plus, you’re mixing the mascarpone into cream, so don’t worry too much about it.
- Allow the mascarpone mixture to cool completely in the saucepan. Once it has, take some muslin cloth doubled over itself or two nut milk bags (one inside the other – this is what I used) and place it over a large tall container. Pour the mascarpone mixture into the cloth, and tie it up, hanging over the container. This is to allow the whey to drain off the mixture overnight, so don’t allow the bottom of the mascarpone to sit in the drained whey. I tied the nut milk bag around a wooden spoon, and rested the spoon on the edges of the container, to let the bag hang into the container without touching the sides of bottom.
- Place the mixture and container in the fridge and allow to drain overnight, ideally 24 hours.
- The next day, gently untie the bag, and remove the mascarpone. It is now ready to use, and should make approximately 1 cup, which is what you’ll need for the tiramisu.
To make the savoiardi:
- Preheat your oven to 180C/356F and line two large baking trays with baking paper. I like to spray a little oil on the tray first, so the paper doesn’t slide around when I pipe.
- Separate the eggs into two clean dry bowls. Add the egg yolks, 60g (1/4 cup) of caster sugar and 1 teaspoon of vanilla bean paste to the bowl of your kitchen mixer. Beat the mixture on a medium high speed for 10 minutes until it is light and fluffy.
- Using another beater (or working in turns if you only have one beating tool) whip the egg whites and remaining sugar until stiff peaks form.
- Gently fold half of the egg yolk mixture into the egg white mixture. Repeat with the remaining half until it is just combined. Sieve in the flours together, and gently continue to fold until the flours are just incorporated.
- Place your piping bag in a long, tall glass, and add the mixture to the bag. Twist the top to seal. Pipe the mixture into roughly 10cm biscuits, two laps of piping each.
- Place the savoiardi one tray at a time, in the oven for 10-13 minutes, or until the tops are golden. Once cooked, allow them to cool before removing from the baking tray. They will stick a little – apparently sprinkling icing sugar on the baking paper minimises this a little, but I didn’t find much difference. Repeat until all the savoiardi are cooked.
To make the coffee liquor mixture:
- Place all the ingredients in a wide bowl and mix to combine. Set aside.
To make the tiramisu cream mixture:
- Add the cream to a large mixing bowl and beat on a low speed for 5-10 minutes, until it appears thicker and more ‘fluffy.’ I find that lactose free cream doesn’t quite get to the ‘whipped’-ness of regular cream, but as long it the bowl feels airy and light, you should be fine. The cream mixture seems to aerate while in the tiramisu itself, so it will be nice and fluffy when you go to eat it.
- Sift in the icing sugar, and continue to beat until the mixture starts to thicken. Once it does, add the mascarpone, and beat to combine. Set aside.
To assemble:
- Choose your vessel depending on how thick you like your layers of cream to be. I decided on a large tray, keeping the servings of dairy to a minimum per slice. What you choose is up to you, but you might have extra savoiardi leftover if you go for super thick cream layers.
- Quickly dunk each savoiardi in the coffee liquor mixture. The crunchier the savoiardi, the longer you can leave it to dunk.
- Arrange the dunked savoiardi in the bottom of your baking dish, covering all bases but not double layering. Continue until the base is covered. It’s ok if there are little gaps, because the mixture firms up amazingly and it will be easy to scoop out regardless.
- Follow the savoiardi with half the cream mixture. It’s more important to completely cover the top of the tiramisu (for aesthetics, anyway) so make sure you save enough for that.
- Top the cream layer with a really generous grating of dark chocolate. I use a microplane, and I keep going until I can no longer see any cream peaking through. I think this chocolate layer makes the difference between an OK tiramisu and an amazing one.
- Repeat the savoiardi layer, using up all the rest of the coffee mixture. In my tests, the liquid proved exactly the right amount for the savoiardi, but if you have some leftover, drizzle it over the savoiardi layer or discard it. If you don’t have enough, whip up a little more.
- Top the tiramisu with the final layer of cream. Spread the cream really carefully – the tops of the savoiardi are delicate, and you can easily end up with cream full of crumbs. I like to dollop the cream evenly across the tiramisu, and then use a small, nimble knife or spoon to gently spread it around. Continue spread until the entire top of the tiramisu is covered.
- Finish the tiramisu with a super generous grating of the dark chocolate. I use the entire 50g (between both layers).
- Tiramisu is best served the next day, when the flavours have had a chance to meld and the cream has set nicely. This one keeps covered in the fridge for a few days, if you can restrain yourself for that long.
Tried this recipe?Let us know how it was!