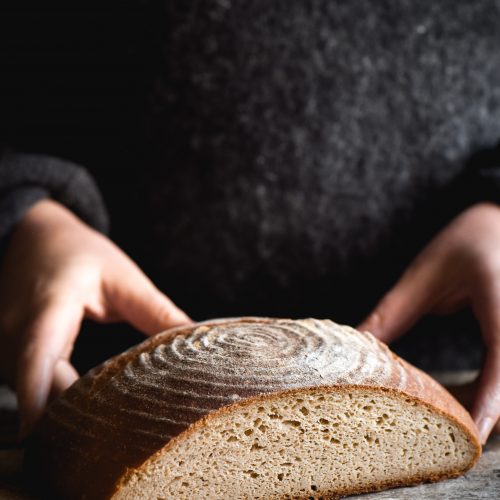
Gluten free, vegan sourdough bread
Gluten free, vegan, nut free, rice freeRequires an overnight preferment
Ingredients
For the preferment:
- 150 g thick bubbly active gluten free sourdough starter, fed 3-4 hours before and on a rise
- 150 g water
- 100 g sorghum flour
For the sourdough bread:
- 100 g buckwheat flour
- 100 g tapioca flour
- 250 g toasted quinoa flour
- 13 g fine salt
- 1/4 teaspoon ginger powder see notes on dough enhancers
- 1/4 teaspoon vitamin C powder see notes on dough enhancers
- 30 g psyllium husk powder
- 500-550 g water see notes
- 2 tablespoons olive oil
- 1 tablespoon maple syrup or honey
Instructions
The night before:
- Use a whisk to combine all the ingredients for the preferment. Cover with airtight wrap and leave on the bench overnight.
The next morning:
- The preferment should have a strong, fermenty smell (perhaps a little acidic) and look like there are old popped bubbles on the surface. It might be a little watery on top and look like it has risen and then subsided. This is all OK. You will be feeding it again with the addition of the flour in the bread.
- In a large, non-reactive mixing bowl (glass or plastic) combine all the ingredients and whisk really well until a smooth batter forms. It will start to thicken up considerably as you whisk. Cover and allow the batter to sit for 20 minutes. By this time, it should have firmed up (thanks psyllium) sufficiently to form a ball of dough.
- Flour a bench with rice flour (contradictory I know, but rice flour is used even in regular sourdough baking!) or sorghum flour. Flour the ball of the dough so that it doesn't stick to your hands or the bench. Try to use as little as possible whilst not skimping.
- Mould your dough into a round banneton shape or a loaf shape. I use the shaping techniques linked in the tips section above.
- To get the loaf into the banneton, I lift it up and place a hand underneath the loaf, touching the seam. Using my other hand, I lower the banneton onto the loaf and then flip the banneton over.
- Place the banneton in a jumbo ziploc bag and seal it shut. Proof the loaf for 2+ hours on the bench, nothing that the temperature of your kitchen and the season you’re in is critically important in proofing times.
- After around 2 hours or when the loaf has tangibly risen, transfer it to the fridge for 1-3 hours to finish proofing. I find this an easy, almost foolproof way to ensure the loaf proofs nicely without over proofing. Note that these timings are for a warm kitchen in an Australian summer – your timings might vary dramatically.
- 45 minutes before the loaf is ready, preheat your oven with your dutch oven inside to 350C or 660F. Note that some dutch ovens are not designed for high temperatures so only go as high as you can without damaging your dutch oven.
- When the loaf is visibly ready to go, dampen your kitchen bench slightly and lay down some durable baking paper. I like the reusable stuff as it has good strength. I find the regular Multix quite weak when damp, meaning I deflate my loaf trying to get it into the dutch oven.
- Invert your loaf very gently onto the baking paper, and score using your lame or a very sharp blade.
- Working quickly, remove the dutch oven from the oven and take the lid off. Very gently and carefully (it is scorching hot) lower the loaf on the baking paper into the dutch oven, and very gently place the lid back on. Any jolting can knock the air out of the loaf.
- Bake the loaf at the highest possible setting for 20 minutes. Oven spring occurs in this time, so you want the oven to be as hot as possible. After that, turn the oven down to to 200-220C or 390-420F and cook the loaf for an additional 40 minutes.
- Take the lid off and cook for an additional 25-30 minutes (with an option to turn the oven down to 180C/350F for a blonde crust) or until the loaf is golden and feels hollow when you knock on it. If the loaf is already quite dark, keep the lid half on but slightly ajar so that air can circulate into the dutch oven.
- Once cooked to your liking, remove from the oven and baking paper and set on a cooling rack. I find with this loaf it only needs to cool for a couple of hours before you slice into it, but it might be a little wet to the touch. Ideally, slice it the next day after baking.
- I find it lasts well stored in a clean tea towel. While best fresh within a few days, it makes great toast and also freezes well in slices.
Notes
Psyllium husk powder is made from finely ground psyllium husk flakes. Sometimes it can be sold as powder, other times you will need to grind up the flakes in a spice grinder or high speed food processor. The two are not interchangeable - the powder is more absorbent than the flakes.
Hydration of this loaf (as with any loaf) is highly dependent on a number of things. How thirsty your flours are, how hydrated your starter is, and how confident you are with a looser dough. If in doubt, add the lesser amount and then adjust as necessary after the 20 minute resting period. The dough, after resting, should be able to be picked up easily and hold it's shape on the bench. It should also be moist - you should need to lightly flour it to handle it.
I have found this loaf looks very impressive in the proofing stages, but is quite hard to overproof. I haven't pushed it longer than 4 hours thus far (in Australian summer) but I will update the post when I do.
Tried this recipe?Let us know how it was!