Gluten free strawberry pie
Gluten free, FODMAP friendly, nut free
Ingredients
For the pastry
- 2 cups (260g) fine white rice flour
- 1/2 cup (50g) tapioca flour
- 1/2 cup (50g) sticky (or glutinous) rice flour
- 4 tablespoons caster sugar
- 200 g cold butter
- 200 g cold full fat sour cream
- Cold vodka (a teaspoon at a time, to bring the dough together)
For the strawberry filling
- 1 kg strawberries hulled and halved or quartered
- 3/4 cup (150g) caster sugar
- 1 tablespoon fresh lemon juice
- Pinch of fine salt
- 1-2 teaspoons vanilla bean paste
- 1/4 cup gluten free cornflour
TO FINISH:
- Eggwash of 1 egg to brush the pie
- Granulated sugar to sprinkle on top (optional)
Instructions
TO MAKE THE PASTRY:
- Start by ensuring that all your liquid ingredients are super cold. Put the butter and sour cream in the freezer, and put ice in your water ahead of using it.
- Mix the flours, sugar and salt together in a large mixing bowl. Add the cubes of cold butter and coat them with the flour mix. Now, use your fingertips to gently rub the butter into the flour mixture. At first it will be slow and difficult, but gradually you’ll melt the butter with the heat of your hands and it will start to be more flexible. You don’t want to completely melt the butter – just rub it into the flour in little sheets. This is what makes the pastry puffy and flaky.
- Think of the hand motion as being the same as the one you make to signal someone is rich. Use your thumbs to push the butter up and back into the bowl. I’ve linked a couple of Youtube tutorials if you’re more of a visual learner.
- Once the butter has been rubbed into the flour mixture, it should look a bit like sand that had gotten a little wet.
- Next, add the sour cream and use a spoon to agitate the mixture – distribute the sour cream without roughly mixing. Once most of the sour cream has been incorporated, use your hands to gently bring the dough together without smushing the butter bits.
- Adding liquid here depends entirely on what your dough looks like at this point. If it comes together in a smooth-ish ball with no dry spots, don’t add any liquid. If it is still dry and crumbly, add the ice vodka, a teaspoon at a time. Use your hands to bring the dough together between each teaspoon, and stop as soon as the dough is smooth.
- Divide the dough into 2 balls (one for the base and one for the top.) Tightly wrap the dough in a beeswax wrap (I don’t feel comfortable recommending cling film anymore) press into a rough circle, and place in the fridge for 20-30 minutes.
TO PLACE THE PASTRY IN THE PIE PLATE:
- Generously grease the pie plate with butter and set aside.
- Liberally flour a piece of baking paper with tapioca flour on a dry work surface. Place 1 piece of the pastry dough in the centre of the paper and flour it on the top too. I can’t stress this enough – use plenty of tapioca flour. It’s the only way you’ll come out with your sanity intact.
- Gently roll the dough out, stopping every couple of rolls to flour both sides of the dough. ‘Turn’ the dough regularly (pick it up and flip it over) to prevent it from sticking. Once the dough gets too big to turn, take another piece of well floured baking paper and place it atop the dough. Working quickly, lift the dough up and flip it onto the newer piece of baking paper. Then you can continue rolling.
- If at any point the dough becomes soft and hard to work with, place it flat in the fridge or freezer for a few minutes.
- Once you have rolled it out to a couple of sizes larger than the pie plate, place it flat in the freezer for about 5 minutes to get ready for the pie plate.Gluten free pastry is pretty sensitive, so be ready to patch up tears with your hands.
- Lay the pastry flat on a working surface like a table so you have a bit of space underneath for your hands. Place the pie plate gently in the centre of the pastry dough in whatever position maximises pastry overhang.
- Use one hand to pull a corner of the baking paper towards you, and place the other directly underneath the centre of the pie dish. As you pull the pastry off the table, your other hand will push the pastry into the pie dish, after which you will quickly flip the dish, letting the pastry fall into it.
- Don’t stretch the pastry into the dish – be generous with letting it fall into the dish. Patch up any tears as necessary, and then trim excessive overhang, redistributing it to places that may have none.
- Once the whole pie has equal overhang, fold it into the back of the pie dish to create a little wall of pastry. Do this the whole way around. Place the pie base in the fridge while we finish off the rest of the pie, and don’t clean up the tapioca flour space just yet – we have to roll out the top.
TO FINISH THE PIE:
- Combine all the ingredients for the strawberries in a large mixing bowl, and stir well to combine. Set aside to macerate.
- Place the second piece of pastry atop the tapioca floured baking paper. Use a well floured rolling pin to roll it out into a thin sheet, larger in width and length than the pie plate.
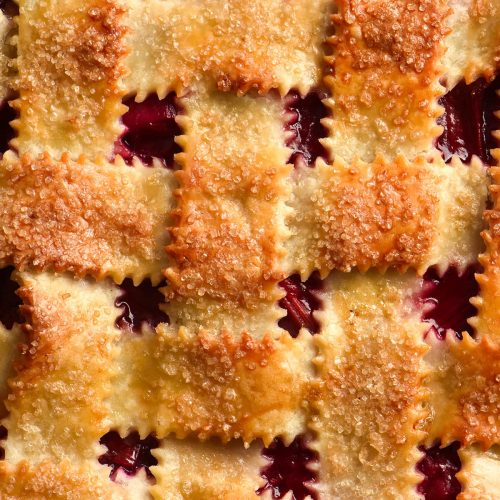
- The design you’d like to create on top is up to you, although I do think it’s nice to see the strawberries. I used an old olive oil bottle cap to punch out the little circles in a very haphazard pattern. The dough is pretty forgiving if it’s at the right temperature, so don’t stress about it too much.
- When you’re ready, gently place the pastry on top of the pie, reserving the punched out bits of pastry, if you’re using this design. I like to flash freeze the rolled out pastry first because it find it easier to place atop the pie.
- Once the lid is on, use your hands to secure it to the pastry edges, moulding them together. If the lid has been flash frozen, leave it to warm up a little or use the heat of your hands.
- To crimp the pastry edges, use a knuckle of one hand to push the dough one way, and your thumb and pointer of the other hand to push into your knuckle, creating a crimp. Repeat the entire way around.
- Place the pie on a rimmed baking tray so that you don’t crush the crimps with fat oven mitt hands and so the strawberry juices don’t coat the bottom of your oven.
- Brush the pie generously with egg wash, and then sprinkle the granulated sugar generously atop. Place the pie in the fridge to set up the pastry while you preheat the oven to 200 degrees Celsius or 400 Fahrenheit.
- Once the oven is ready, place the pie (rimmed baking sheet and all) in the oven for 30 minutes. The strawberries should be oozy and juicy and the pastry golden brown. If you want a little extra colour on the pie, place it under the grill for a couple of minutes, watching it closely.
- Remove from the oven and allow to cool. For best results, allow it to cool totally and completely (3+ hours to overnight) so the juices set up and the pie is easy to slice and serve.
Notes
- As of 2022, Monash has downgraded the FODMAP threshold for strawberries. Super depressing, I know. 5 berries or 65g per serve is now considered a FODMAP friendly amount. This means that one serve of the pie would contain 125g of strawberry. If you are fine with berries and have no issues, amazing! Proceed as usual. If you have had issues with them, consider making this into a rhubarb and strawberry pie, using 500g rhubarb and 500g strawberries. That will put you smack bang in the acceptable range for strawberries.
Tried this recipe?Let us know how it was!