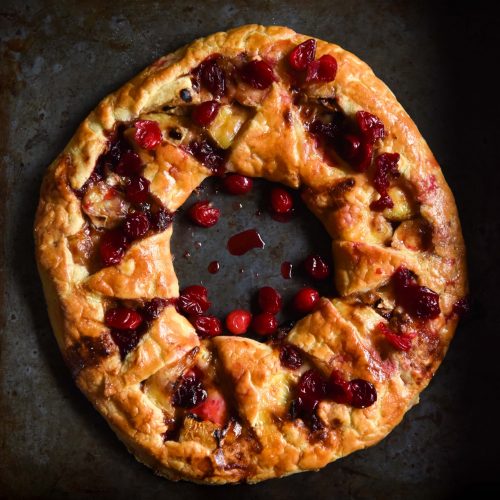
Gluten free brie and cranberry wreath with easy flaky pastry
Gluten free, FODMAP friendly, nut freeServes 6-8 as a starter
Ingredients
For the pastry:
- 160 g (1 cup) fine white rice flour
- 30 g (1/4 cup) tapioca flour
- 30 g (1/4 cup) glutinous (otherwise known as sticky) rice flour
- 1/2 - 1 teaspoon fine salt
- 100 g cold butter
- 100 g full fat sour cream
- Ice water only as needed
For the filling:
- 1 1/2 cups frozen cranberries
- 3 tablespoons caster sugar
- 1 tablespoon water
- Pinch of ground clove
- Grating of fresh nutmeg
To finish:
- 1 wheel of brie, camembert or a lactose free alternative
- 1 egg for eggwash
Instructions
To make the pastry:
- Start by ensuring that all your liquid ingredients are super cold. Put the butter and sour cream in the freezer, and put ice in your water ahead of using it.
- Mix the flours, sugar and salt together in a large mixing bowl. Add the cubes of cold butter and coat them with the flour mix. Now, use your fingertips to gently rub the butter into the flour mixture. At first it will be slow and difficult, but gradually you’ll melt the butter with the heat of your hands and it will start to be more flexible. You don’t want to completely melt the butter – just rub it into the flour in little sheets. This is what makes the pastry puffy and flaky.
- Think of the hand motion as being the same as the one you make to signal someone is rich. Use your thumbs to push the butter up and back into the bowl. I’ve linked a couple of Youtube tutorials if you’re more of a visual learner.
- Once the butter has been rubbed into the flour mixture, it should look a bit like sand that had gotten a little wet.
- Next, add the sour cream and use a spoon to agitate the mixture – distribute the sour cream without roughly mixing. Once most of the sour cream has been incorporated, use your hands to gently bring the dough together without smushing the butter bits too much.
- Adding liquid here depends entirely on what your dough looks like at this point. If it comes together in a smooth-ish ball with no dry spots, don’t add any water. If it is still dry and crumbly, add the ice water, a teaspoon at a time. Use your hands to bring the dough together between each teaspoon, and stop as soon as the dough is smooth.
- Tightly wrap the dough in a beeswax wrap (I don’t feel comfortable recommending cling film anymore) and place in the fridge for 20-30 minutes.
To make the cranberry filling:
- Place all the ingredients for the cranberry filling into a small saucepan over a low-medium heat. Allow to cook for around 10 minutes until the cranberries are thawed and the liquid has become more of a cranberry syrup. Set aside to cool.
To assemble:
- Preheat the oven to 200 degrees Celsius or 392 degrees Fahrenheit.
- Once the cranberries are cooled, liberally dust a large sheet of baking paper with tapioca flour on a large, dry surface.
- Bring your pastry up to a temperature where you can roll it out. You can tell if it’s ready to roll (lol) because it will be a little flexible and malleable under the weight of the rolling pin. If it’s hard and cracks when you try to roll it, give it a little extra time on the bench.
- When it’s ready, gently give the square of pastry a few whacks with the rolling pin to encourage into a general circle shape. From there, gently roll out the pastry, moving it around every few rolls to ensure it hasn’t stuck to the baking paper. Use as much tapioca flour as necessary – unless you’ve added a whole bag it won’t affect the final product.
- If you’re in a particularly warm climate, pop the pastry back into the fridge as soon as it gets too warm. If the butter pieces melt the pastry will lose it’s puff and we don’t want that at all.
- Once you have rolled the pastry into a large circle (size doesn’t matter too much, as long as the pastry is roughly 1/2 centimetre in thickness) flour the top liberally. Take another piece of baking paper, and use a gentle but quick motion to flip the pastry over onto the new baking sheet. I use one hand to pull the baking paper to the edge of the table, and the other to place under the pastry and flip it over. This is to ensure that the pastry isn’t stuck to the original baking sheet while cooking.
- Take a small-medium circular bowl (this will be the centre of the wreath) and lightly imprint it in the centre of the dough. DO NOT press it down to cut a whole, just enough to form a circle imprint.
- Use a sharp, non-serrated knife to cut across the circle, forming even triangles. Have a look at the Youtube video linked because it’s a simple process but hard to describe. Once you have finished cutting, the centre will almost be a kind of star. These pieces will pull up over the pastry to form the wreath.
- Paint the cranberry mixture evenly around the centre star, leaving some space on the outer edges to pull them up over the filling. Top this with small slices of the brie. I sliced my wheel of brie into even, reasonably thin slices, and then sliced said slices into 3. How big your pieces are will depend on how big your wreath is and thus how thinly you need to spread the cheese.
- Once filled, gently pull up the outer edges of the pastry and press them into the brie cranberry filling to secure them. They should wreath about half way across the filling.
- Next, gently flip up one little triangle of the inner star, and fold it up over the filling, adjoining the outer edges of pastry and creating the little inner star. Repeat with the remaining triangles, ensuring they have adhered to the outer pastry (or else the wreath will become a volcanic mess of brie in the middle.)
- Once the wreath is completely assemble, brush it with a well whisked eggwash. Gently slide the wreath onto a baking tray (this is easiest by gently but quickly pulling it off the table and onto a waiting baking tray) and place in the oven for 20 minutes.
- Once the 20 minutes is up, give it an extra brush with the egg-wash to patch up any cracks. Return to the oven for another 10 or so minutes, until the top is golden brown and the brie is bubbling. You can serve with a few extra cranberries or as is. This is best served straight from the oven as brie tends to be a little tougher when you reheat it after melting. That said, it’s delicious when cooled too.
Tried this recipe?Let us know how it was!