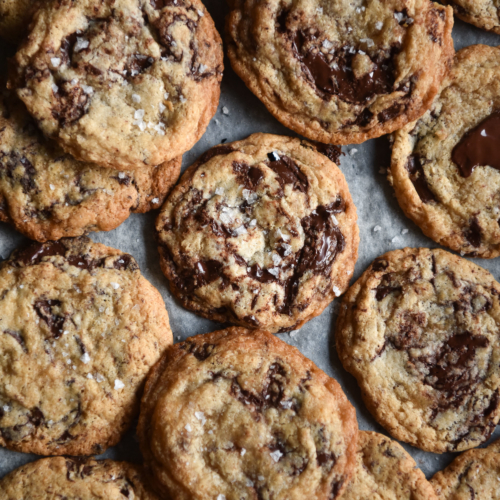
Vegan gluten free choc chip cookies
Nut free, xanthan gum free
Ingredients
- 75g COLD vegan butter (needs at least 65% fat per 100g, I used Nuttelex Buttery for all my tests)
- 50g light brown sugar
- 25g caster sugar
- 2 tsp vanilla bean paste (I use Queen because it's nice and thick)
- 2 tsp cold soy milk (I used Bonsoy)
- 55-70g tapioca flour (read notes carefully)
- 30g brown rice flour (make sure it's finely milled)
- 1 tsp baking powder
- 1/4 tsp fine salt
- 50-100g vegan chocolate (I used Lindt dark, I haven't tried a coconut oil based one)
- sea salt flakes, to finish
Instructions
The night before:
- Weigh the sugar and COLD vegan butter out. It should come straight from the fridge, and have been there overnight beforehand. Please don't pop it in ten minutes before creaming and then ask me why they didn't work.
- Place them into the bowl of your kitchen mixer. Add the vanilla bean paste and cream for 1 minute on a high speed. I use my whisk attachment and cream on speed 6 on a Kitchenaid.
- Use a spatula to wipe down the bowl edges, making sure there's no rogue butter or sugar there. Cream for another minute. The mixture, while the whisk attachment is whisking through it, should look like a light coloured cookie batter already. The whisk should leave tracks.
- If you live in a hot climate or a summery one (I tested this in the depths of winter) consider transferring the vegan butter mixture to the fridge while you weigh the flours out.
- Weigh the flours, baking powder and salt into a small bowl. Use a clean, dry whisk to thoroughly combine.
- Remove the butter mixture from the fridge, and measure out the COLD soy milk. I use soy milk. Mix the soy milk into the butter mixture until the edges pull away from the bowl.
- Add the flour mixture to the butter, ensuring you get every little bit. Even 5g deviation in these cookies makes a huge difference. Use a spoon to mix until the cookie dough comes together and is just too wet to handle. Make sure you scrape up every bit of flour from the sides of the bowl.
- I like to transfer the cookie dough back into the flour bowl (which is small and fridge friendly) and cover it to refrigerate overnight. Anecdotally, I found that the vegan chocolate looks prettier and melts more dramatically if you mix it into the cold dough, just before cooking.
The next day:
- Preheat the oven to 180C or 356F.
- Chop the chocolate (texturally and visually far more interesting) and stir through the cookie dough. Anedotally, I have found that putting the oven tray into the freezer for 10 or so minutes before use can help stop excess cookie spread.
- I recommend cooking 1 cookie solo first, just to check that the cookie is exactly what you want. This way, you can easily adjust and proceed. If the cookie is flat, see the flat troubleshooting section, and if you tick everything off, add 5g extra tapioca flour. To address a puffy cookie with no spread, add 1 extra teaspoon soy milk, and bake off another cookie.
- If you're happy with the cookie consistency, place 4 X 1 tablespoon balls of cookie dough evenly across the tray. They will have shaggy edges (you can't roll this dough with your hand) but thats fine. Put them in the oven for 10 minutes. When you open the door, they should have spread and puffed up. Gently bang the tray on the oven rack to release the gas in the cookies and create rippled surfaces. Cook them a little longer if they need darkening - only 1-2 minutes, so they're still crispy inside.
- Repeat with the remaining cookies on a cold tray.
- Allow them to sit on the tray for a minute or so, before gently transferring the baking sheet onto a cool surface. Don't pick them up for AT LEAST five minutes - they are molten sugar without an egg to bind, and need time to cool.
Tried this recipe?Let us know how it was!