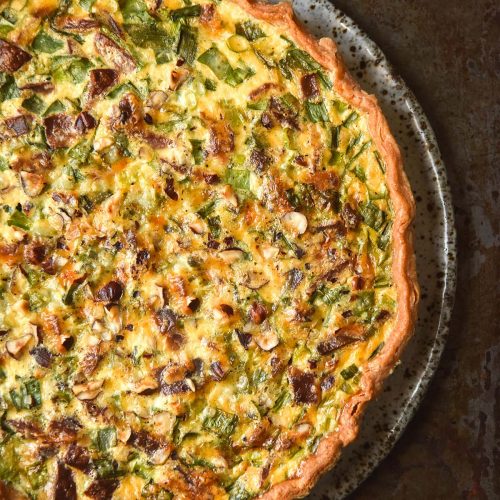
Gluten free quiche
Xanthan gum free, vegetarian option, nut free optionMakes 1 quiche, around 8 slices*Cups and measures are in Australian cups and measures. Use gram and ml for international accuracy.
Equipment
- 1 X 26cm fluted tart tin OR
- 1 X 25cm (10 inch) pie dish (25cm top measurement, 20cm base measurement)
Ingredients
For the pastry:
- 160 g (1 cup)* fine white rice flour
- 60 g (1/2 cup)* tapioca flour (see notes)
- 1 – 1 1/2 teaspoons fine salt
- 6.5 g (2 teaspoons) psyllium husk powder
- 125 g butter cold and cubed
- 75 g full fat Greek or plain lactose free yoghurt see notes
- Ice water to bring the dough together I needed 60ml 1/4 cup
To finish the quiche:
- 4-5 extra large eggs see notes
- 125 ml (1/2 cup)* milk of choice
- 125 g vegetarian bacon or regular bacon chopped into small pieces and pan fried
- One bunch spring onion greens washed and finely chopped
- 75-100 g vintage cheddar
- Seasoning to taste
Instructions
To make the tart shell:
- Preheat the oven to 180C/356F. Place one rack in the lower section of the oven and the other in the top section. We will use the top rack to house a piece of foil to stop the crust edges from over-baking, so make sure it’s not too close to the grill.
- Combine the flours, salt and psyllium husk in a large mixing bowl. Add the cold cubes of butter, and use your fingers to rub the butter into the flour until only small bits remain. It should resemble a course meal.
- Stir in the yoghurt then get your hands in and distribute it evenly. Add the water – just enough to form a smooth dough with no dry bits on the bottom of the bowl. Use the least possible amount of water to achieve this – drier pastry equals crispy, flaky pastry. Bring the dough together into a ball. You can chill the pastry for a little while in the fridge, or proceed to rolling out.
- Lightly flour a sheet of baking paper with tapioca flour. Use a rolling pin to smack the dough down into a rollable shape, then roll into a long rectangle. Don't worry if it cracks. Take the top third of the pastry and fold it down onto the middle third of the pastry. Take the bottom third and fold it up onto the middle third of the pastry. Use you rolling pin to smack the dough down to rollable height again, and roll it out. If the pastry isn't smooth and easy to handle, repeat this process once more. It should be easy to roll out with minimal cracking.
- Roll the dough out into a large rectangle – about 3-4 centimetres wider than the lip of the pie dish. Patch up any cracks as they appear. The dough should be about 1/2 centimetre thick.
- Place your pie dish in the centre of the dough. Slide one hand under the baking paper and into the centre of the dish. Use the other hand to hold the dish. Flip the dish over and let the pastry fall into it. Be generous in letting the hanging parts of pastry fall into the dish or it will break.
- Patch up any cracks and press the pastry firm up against the sides of the dish. Trim the overhanging edges with scissors and neaten them up or crimp them as you see fit. Use a fork to poke some air holes in the pie base, then crunch up a piece of baking paper and place it onto the pastry, flush with the sides. Use pie weights (I use old rice and chickpeas as my pie weights) to fill the baking paper and press them flush up against the edges. This will stop the pastry from drooping as it bakes.
To finish:
- Place a large flat piece of foil on the top oven rack and the pie on the lower shelf. Bake the pie for 30 minutes. Very gently remove the baking paper and pie weights – they might be stuck to the pastry and the pie weights will be hot. Place the pie weighs onto something heat proof.
- Whisk up the eggs for the quiche, then paint egg on the base and sides of the pastry. Return the pastry to the oven for 10 or so minutes, or until the base is no longer translucent.
- Mix the remaining filling ingredients into the whisked eggs. When the base is ready, pour the mixture into the base and return to the oven for 30 minutes or until cooked through. I like to keep the foil in the top of the oven for the first 10 minutes to help the cheese melt evenly, but this is optional.
- You can serve warm or cool, and leftovers can be stored in an airtight container in the fridge for a couple of days.
Notes
- Use 5 eggs for a firmer and eggier filling.
- See notes in the body of the post for FODMAP contents.
- See tips and tricks in the body of the post for making the pastry.
Tried this recipe?Let us know how it was!