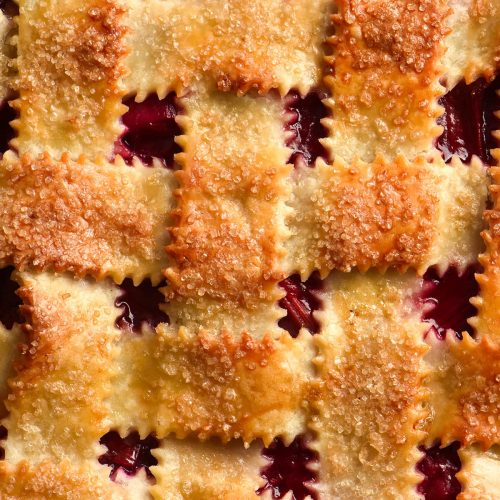
Grain free pastry (nut free)
Gluten free, nut free, low lactose Makes 2 sheets, enough for 1 pie base and lid or 1 large/2 small galettes, 1 large batch of sausage rolls*This recipe uses Australian cups and measures. Use gram and ml for international accuracy.
Ingredients
- 200 g butter salted or unsalted, chilled and cubed
- 150 g cassava flour
- 150 g potato starch
- 3/4 - 1 teaspoon xanthan gum
- 1/4 teaspoon fine salt for a sweet version or 1 teaspoon for a savoury version
- 75 g icing sugar omit for a savoury version
- 125ml (1/2 cup)* iced water, only as necessary
- Tapioca flour for rolling out the pastry
Instructions
To make the pastry:
- Make sure your butter is cubed and chilled before you begin.
- Whisk to combine all the dry ingredients in a large mixing bowl.
- Add the cubes of butter and use your fingertips to rub the butter into the flour mixture.
- Use a clicking motion to press the cubes of butter forwards through your fingers, creating small sheets of butter in the dough.
- Once all the cubes are rubbed in, carefully begin adding the water. You want the pastry to just come together without any dry spots, while adding as little water as possible. Less water (without the pastry being crumbly or dry) = crispier pastry.
- Continue adding water until you can just bring the dough together in a ball. There should be no dry spots. Decant the pastry into a large sheet of cling film. Wrap it loosely and then press it down into a flat rectangle. Place the pastry in the fridge to chill for 30 minutes.
To laminate the pastry:
- Once chilled, lay the pastry on a large piece of baking paper floured liberally with tapioca flour.
- When the pastry is warmed enough to be just a bit malleable, begin rolling it out into a rectangle. Size doesn’t matter, but it does need to be able to fold into three. I aim for about 30cm long.
- Once the pastry is rolled, dust off the excess flour. Take the top third of the pastry and fold it down onto the centre third of the pastry. Then, take the bottom third and fold it up over the middle third. It will likely crack at the sides, and that’s fine. If you feel like it’s too cold to roll out, leave it to sit for 5 or so minutes (climate dependent – I developed this recipe in a warm kitchen, so your pastry might need longer).
- Turn the pastry stack so that the short side faces you. Repeat the process of folding and rolling the pastry two more times, for a total of three folds. Dust the pastry of excess flour and return it to the fridge to chill. After 30 minutes chilling the pastry is ready to use.
- For best results, use the pastry within a day. It can also be thoroughly wrapped and frozen. Allow frozen pastry to come to room temperature before use.
Notes
This pastry needs to be thoroughly cooked to avoid a chewy middle. It also benefits from a resting period after baking to ensure the pastry is flaky and not chewy. See the body of the post for recipes that use this grain free pastry.
Tried this recipe?Let us know how it was!