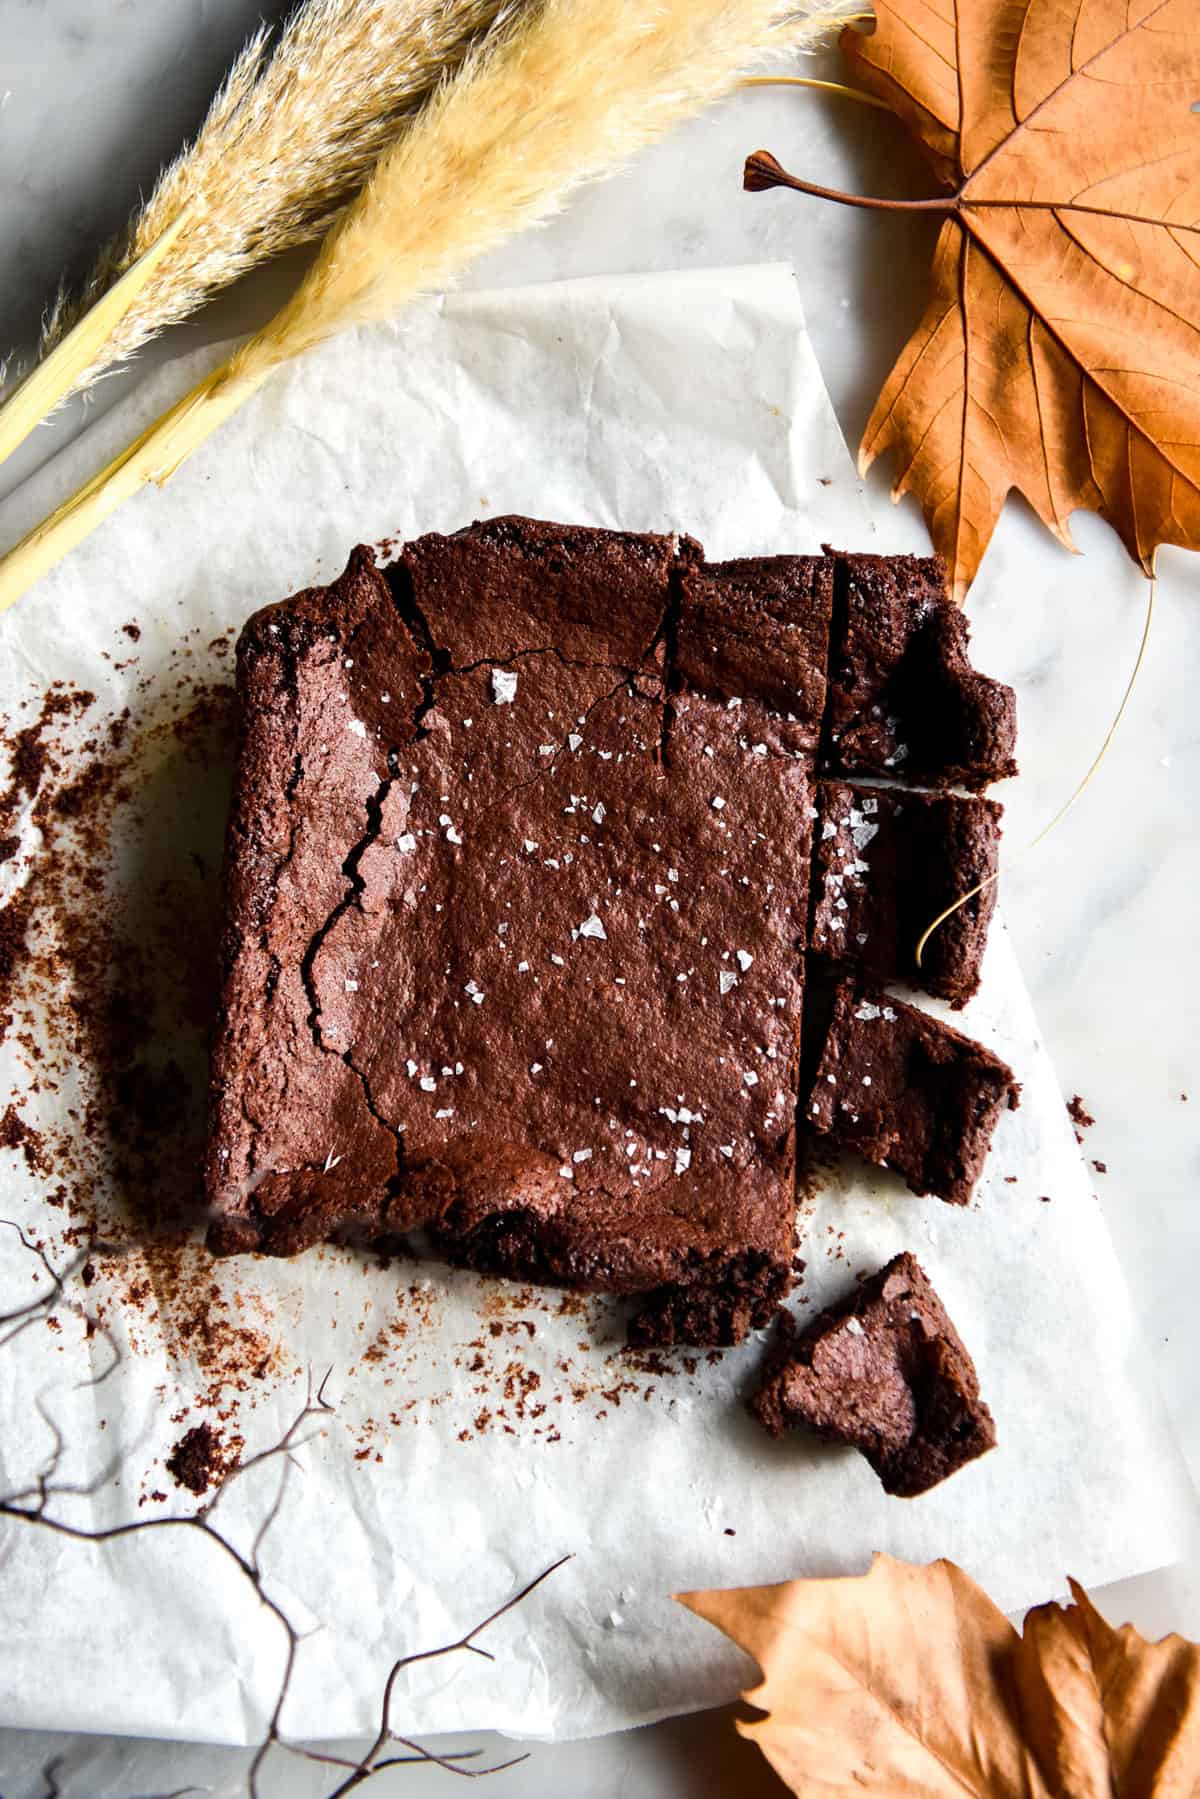
Vegan gluten free brownies made with almond meal
After the wild ride that was your reaction to the fudgy, grain free brownies, this had to happen. Introducing my new favourite child: vegan, gluten free brownies. They’re grain free, FODMAP friendly, and contain basic pantry staples (of a vegan, gluten free household.) No psyllium husk eggs, no random gums or ingredients that take 6-8 weeks to arrive from Amazon. Good old home ingredients, for the fudgiest vegan gluten free brownies you’ve had.
FODMAP notes for your vegan gluten free brownies
Let’s dive straight in, shall we? These brownies are made using tapioca flour and almond flour. Almond flour, or almond meal, is FODMAP friendly in 1/4 cup serves per person. In other words, you’d have to eat a 3rd of the brownies to overdo it. Which is entirely possible when it comes to brownies, but I digress.
Other than that, the other ingredients are generally pretty FODMAP friendly. Because we’re using vegan chocolate and butter, there is no lactose to be seen. Sugar is also a low FODMAP ingredient, and that basically makes up the recipe!
Recipe notes for your vegan gluten free brownies
Make no mistake, brownies are an art form. Crispy tops are a hit and miss, as are fudgy interiors. It’s important to follow the instructions (yawn, I know) and also to pay attention to the ingredients of the ingredients. Namely, the chocolate. With that in mind:
I use Lindt dark chocolate from a bulk food store. It is sold in little octagonal chips that are couverture, but you can also use the supermarket variety. My favourite is interestingly the couverture brownie. However, according to Lindt’s website, the 70% dark chocolate and upwards are vegan, and easy to find at the supermarket. I would recommend sticking to the 70%, unless you like a very intense brownie.
This recipe hasn’t been tested with a coconut oil based vegan chocolate. I would recommend sticking to Lindt – it’s easy to find, and made from cocoa mass.
An article I read suggested that soy lecithin is responsible for creating shiny topped brownies. Don’t quote me (I can’t be bothered hunting for the article again) but maybe something to consider when chocolate shopping.
Nuttelex Buttery is what I use for my butter substitute. Apparently Earth Balance is a good brand, but I can never seem to find it. Whatever you buy, check the ingredients to see if it’s right for your intolerances. You can buy Nuttelex at the supermarket.
A thing I haven’t tried? A nut free version of the brownie. But it’s coming, I promise.
More vegan gluten free brownie tips
Choose the best quality cocoa you can afford. It really makes a difference.
As with most brownies, these do best made the night before. They have the chance to firm up and meld in flavour.
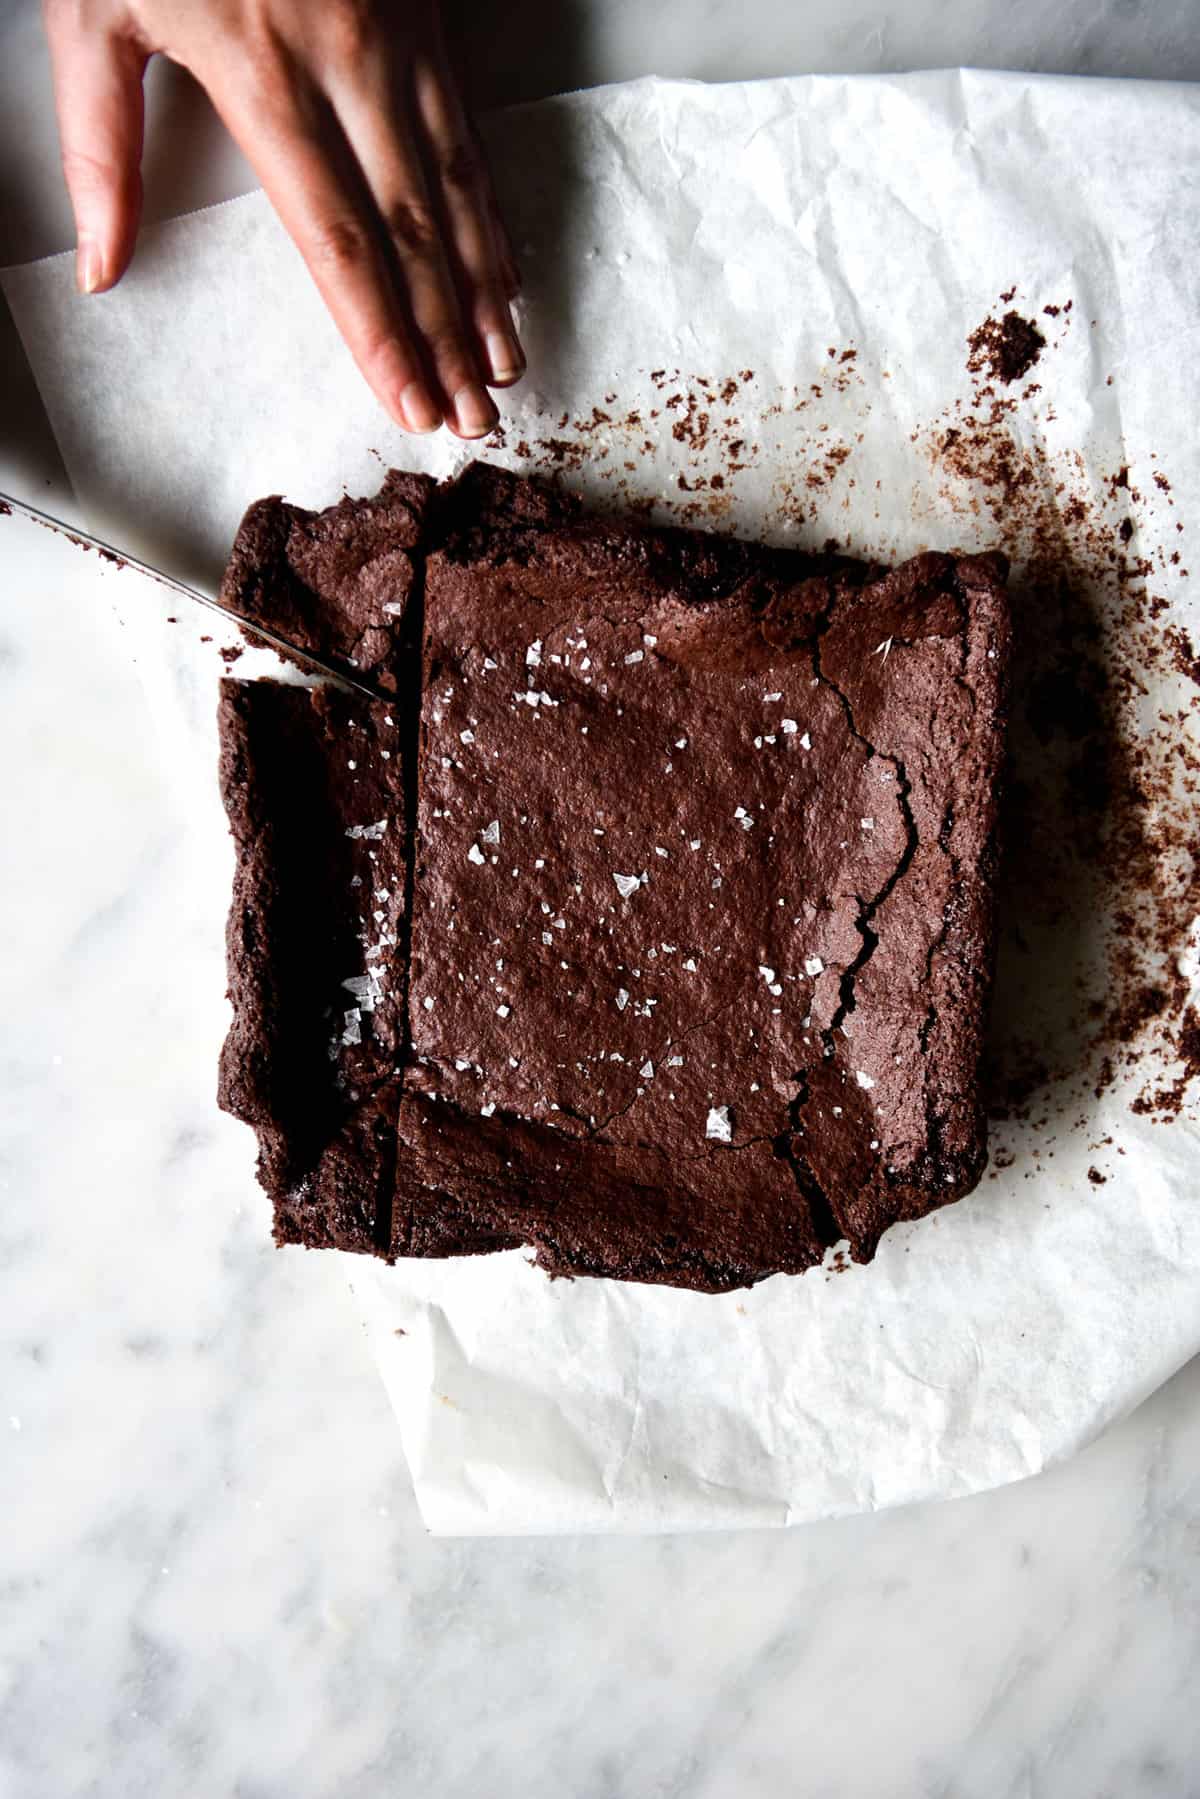
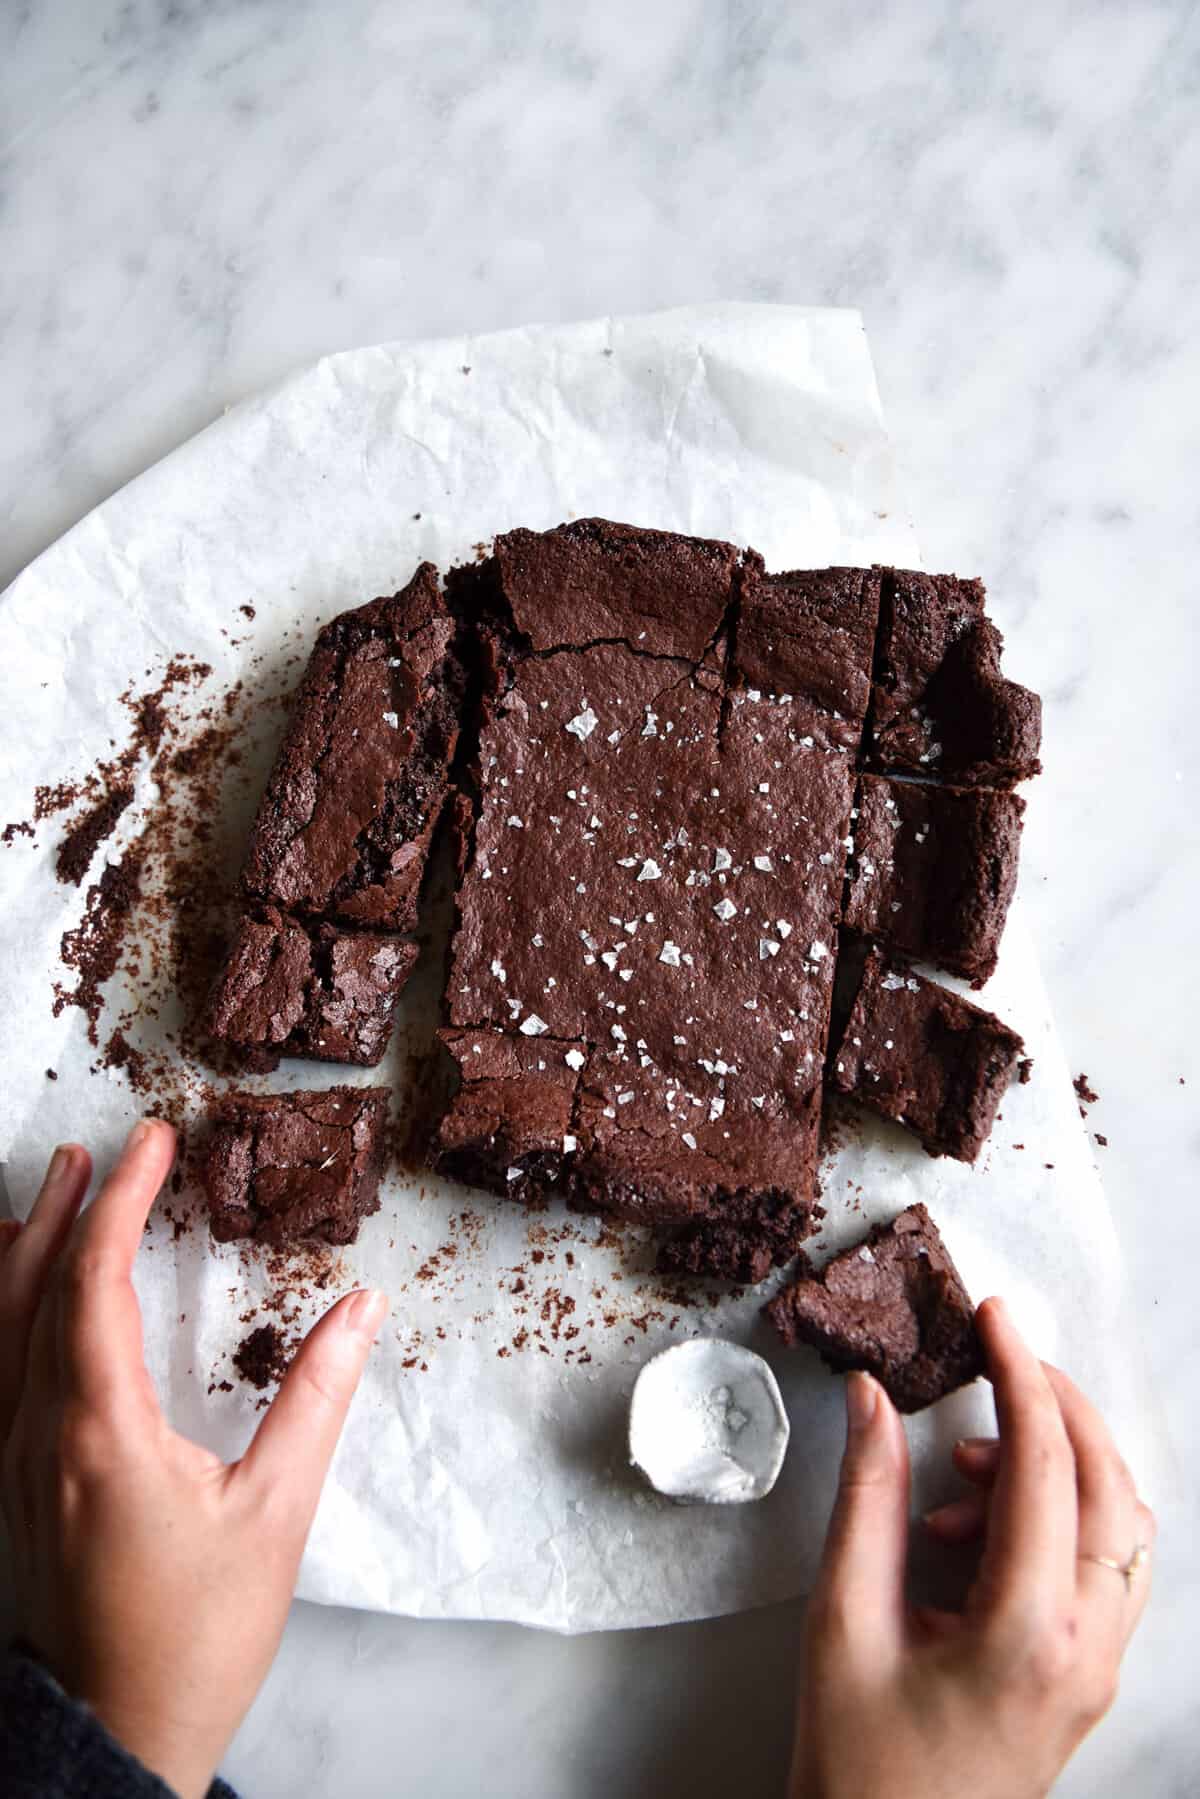
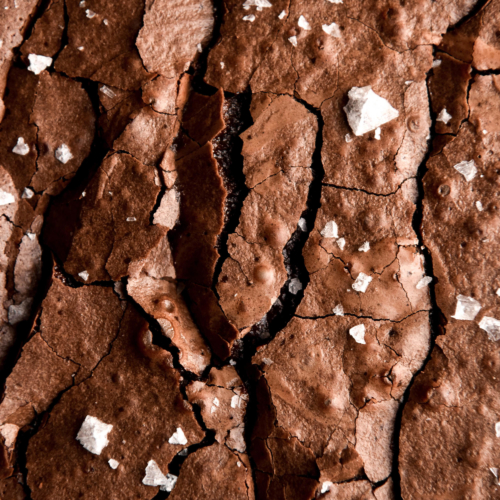
As with the original version, sea salt and espresso go a long way in deepening the chocolate flavour of the brownies. I don’t recommend skipping it.
I have not tried it, but if you’re in a pinch, you could probably substitute tapioca flour with gluten free cornflour.
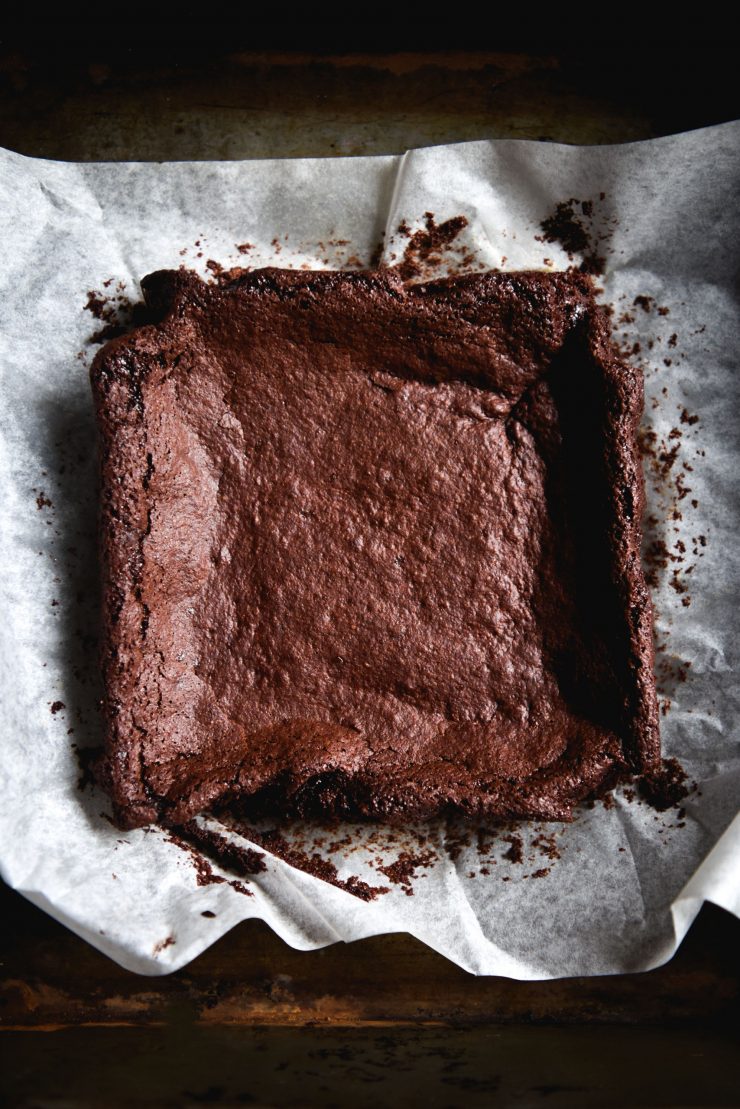
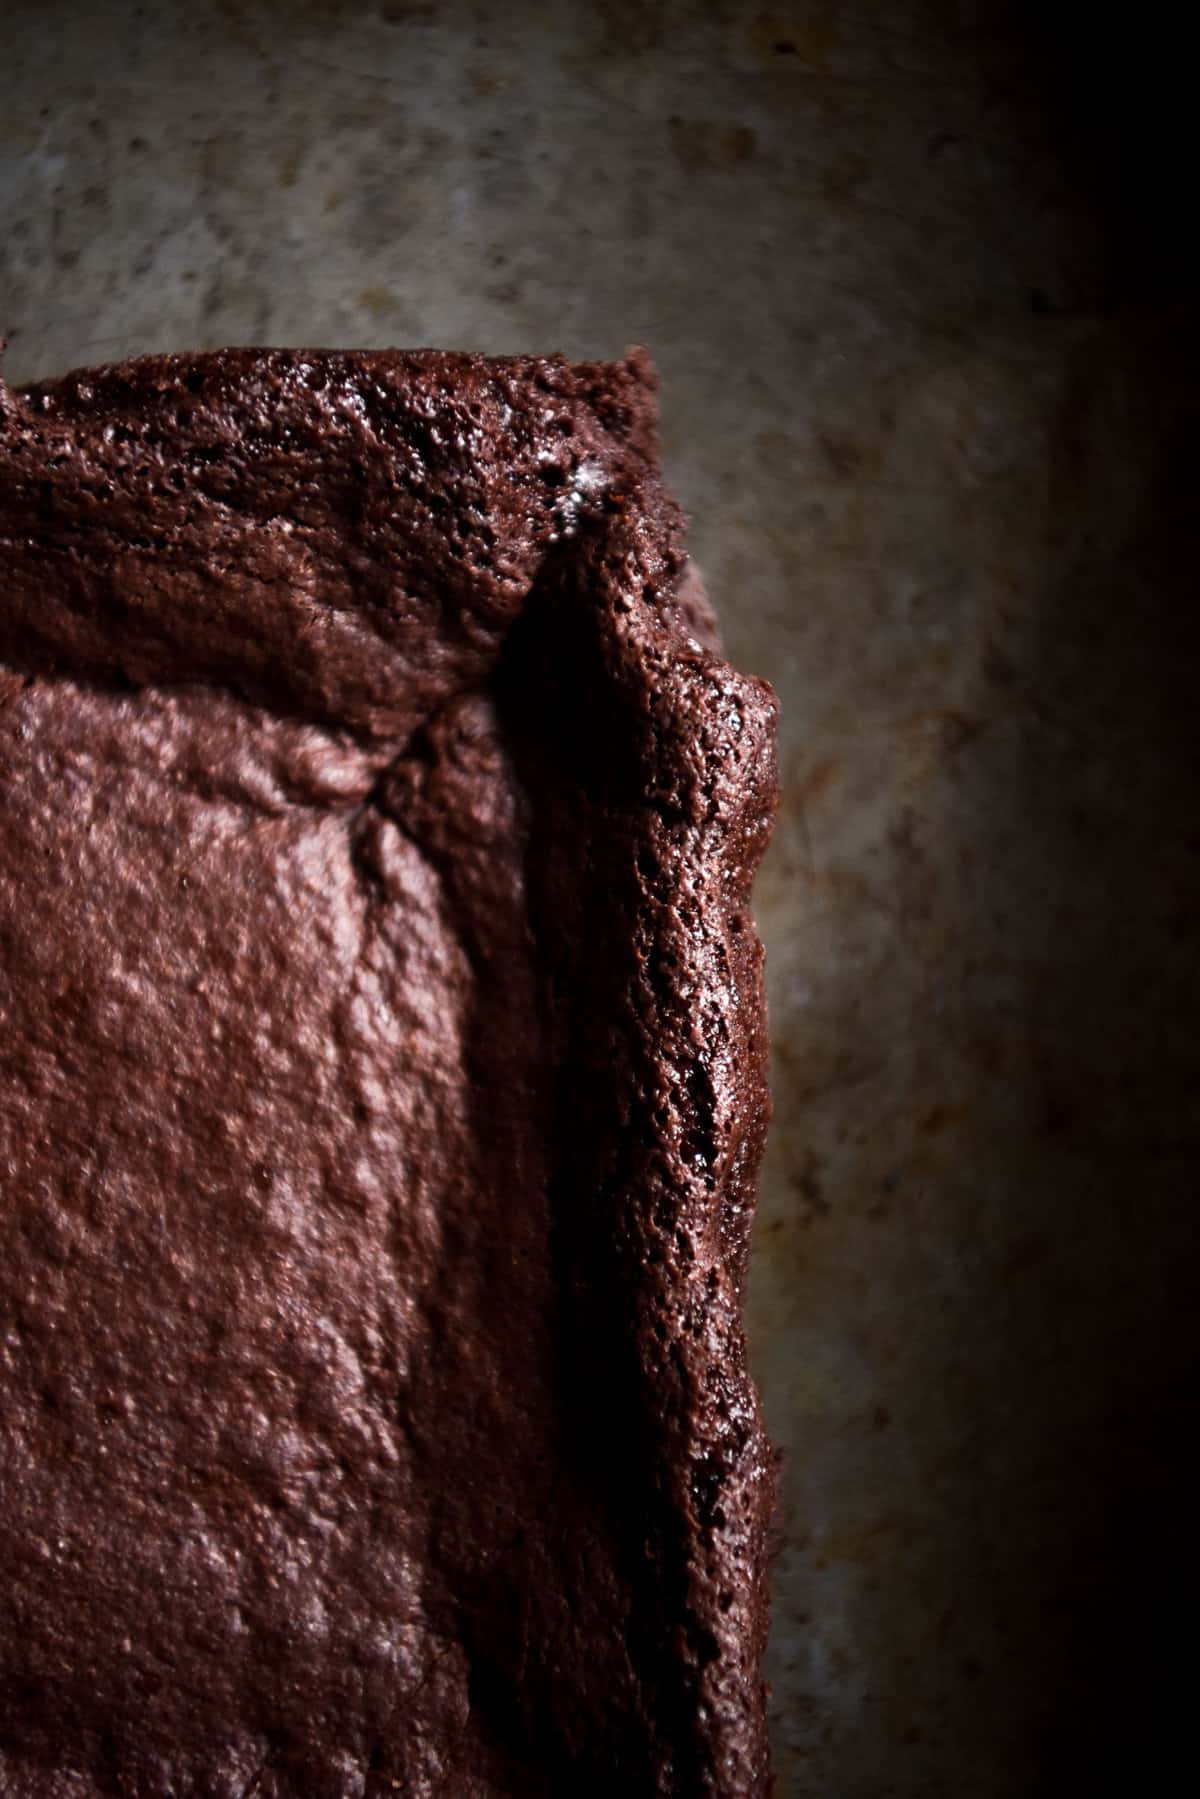
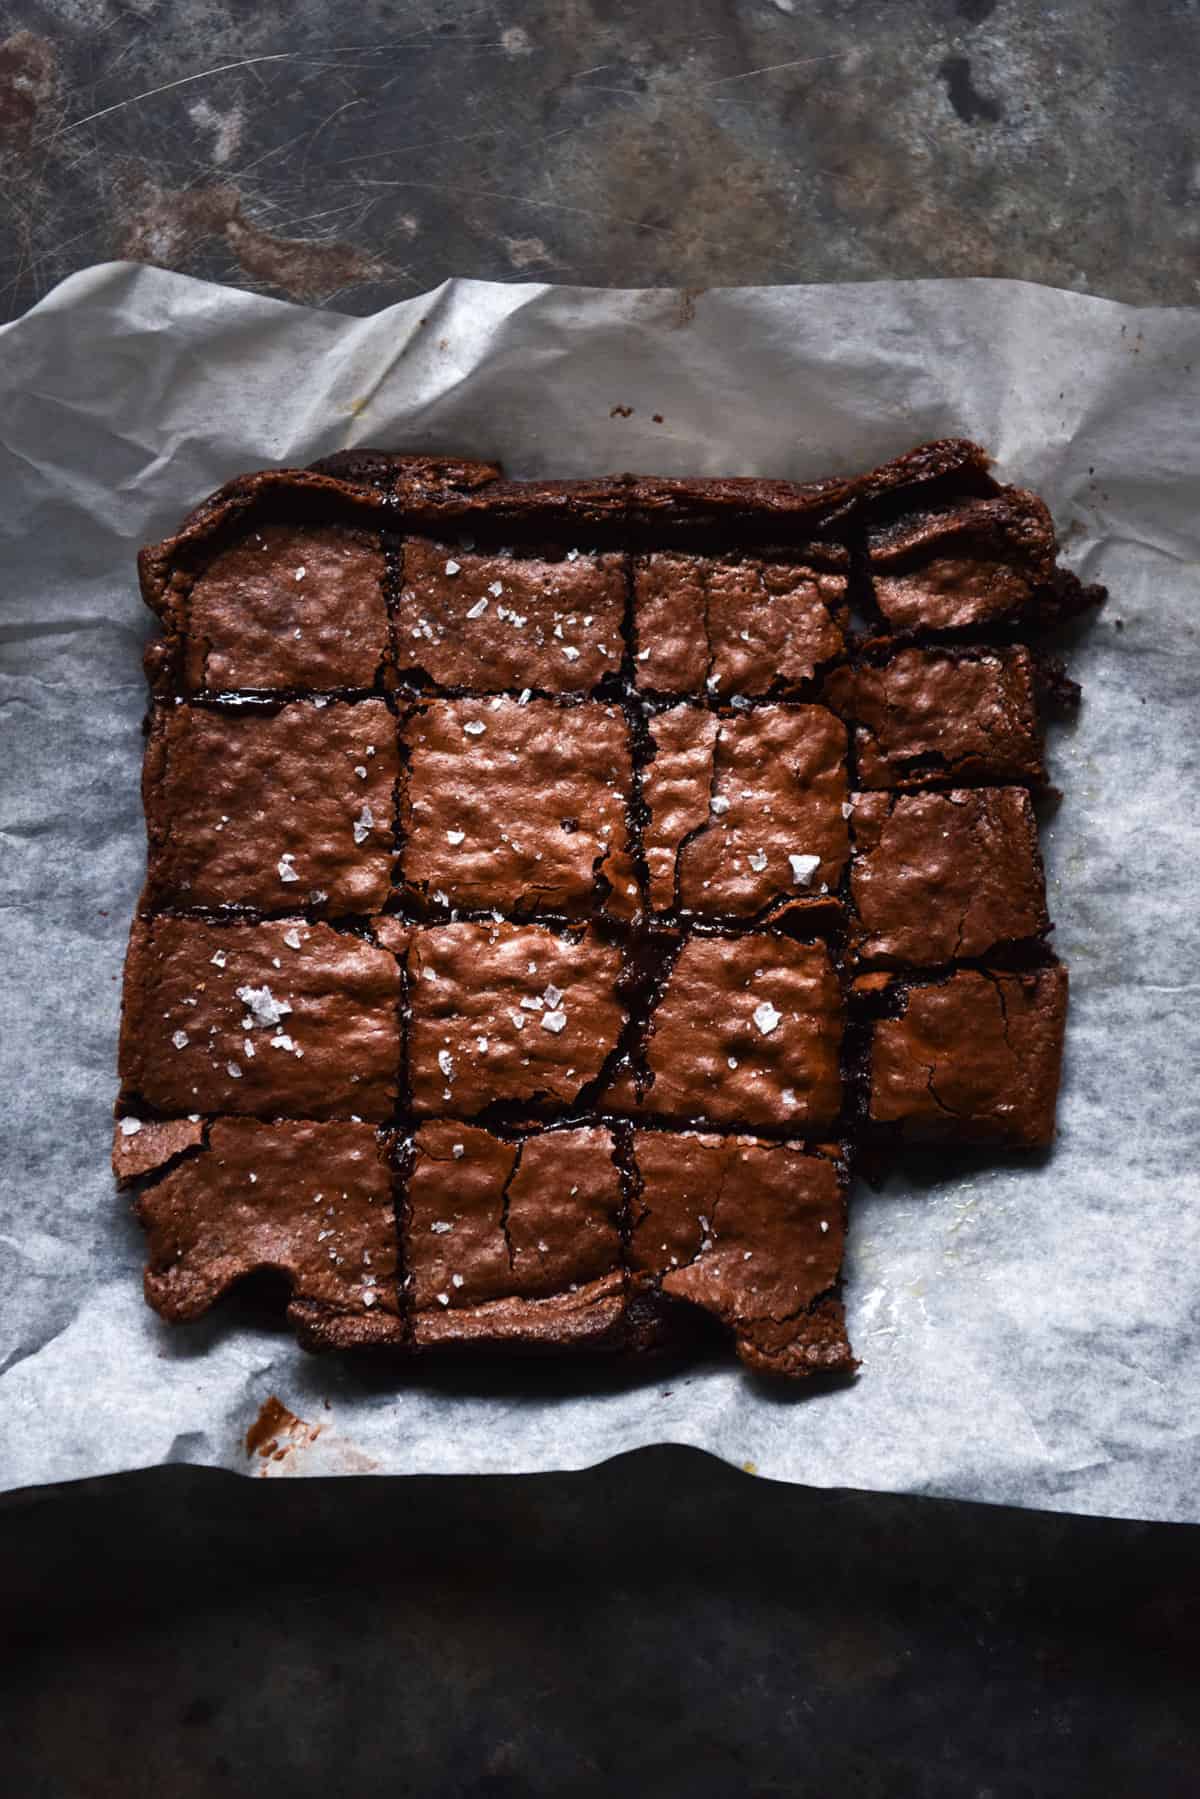
The brownies will come out fudgy. Don’t panic – they set as they cool, so you need to give them time to do that. If you try to cut them straight out of the oven, you’ll be in trouble.
How to substitute vegan butter for coconut oil
So, you want to use coconut oil. Take heed of these tips and go (coco)nuts. Sorry, had to.
- Weigh the coconut oil in solid form. If you’re in a warm climate, this might mean fridging it for a while. If you weigh it liquid, don’t blame me for any undesirable results.
- When you mix in the vanilla bean and sea salt, mix quite vigorously, until the salt makes the mixture thicken and harden. This will make the batter the same consistency as the Nuttelex version. If you skip this step, all will be well, but your brownies will probably be a little flatter and more liquidy, thus taking longer to set.
- It also wouldn’t hurt to give the mixture a vigorous mix or two once the soy milk has been added. Just for safety, you know.
- My personal preference is the butter substitute, but I thought I’d give you the option.
More vegan gluten free dessert recipes
- My forever favourite: the easy and speedy chocolate mug cake
- A delicious Hedgehog slice
- These heavenly peanut butter truffles
- This banana bread
- These vegan brownie cookies
- These delicious cinnamon scrolls made without yeast
Vegan, gluten free brownies
Ingredients
- 200 g vegan dark chocolate see introduction
- 50 g Nuttelex buttery or preferred butter substitute or coconut oil, but see the notes first
- 1/2 cup caster sugar
- 70 g (approximately 1/2 packed cup) light brown sugar
- 1 tablespoon espresso
- 2 tablespoons cocoa
- 1 teaspoon sea salt flakes
- 2 teaspoons vanilla bean paste
- 3/4 cup (75g) Coles Wellness Road almond flour
- 2 tablespoons tapioca flour
- 1 1/2 teaspoons baking powder
- 1/2 cup warm soy milk if it’s cold it will seize up the mixture and ruin the batter
Instructions
- Preheat the oven to 180 degrees Celsius.
- Using the double boiler method, melt the chocolate and butter substitute over a low heat, stirring intermittently. Make sure the bowl is heatproof, preferably metal.
- Once the chocolate and butter are melted, add both sugars to the chocolate mixture, and stir well to combine. Allow to cook a little longer to dissolve a bit of the sugar, 1 or 2 minutes. This step is more important if you're using coconut oil. If you're using Nuttelex, the mixture might be super thick and grainy, which is fine. If it is, take it off the heat and proceed with the next step.
- Stir in the espresso and cocoa until the mixture is combined. Again, depending on the fat used, the texture will differ. The Nuttelex version will look like you could pick it up in a wet ball, whereas the coconut oil version will probably be a thick wet batter. Remove the bowl from the heat, and stir in the sea salt and vanilla bean paste. At this point, I like to put the soy milk in a bowl over the water bath, to warm it up so it doesn’t ruin the batter.
- In a medium mixing bowl, combine the almond flour, tapioca flour and baking powder. Once mixed together, add to the brownie mixture along with the soy milk. Continue stirring until the mixture is thick and shiny. The batter should be pourable but thick – you should need to nudge it around the pan with a spoon.
- Line a 21cm x 21cm tin with baking paper –enough to use as handles to lift the brownies out at the end. Place the brownies in the oven for 25-30+ minutes. I've noticed time isn't nearly as important with these brownies as it is with regular.
- The brownies need cooling time before they are easily sliced. I like to cut the brownies while they’re warm but not hot, before leaving to cool and set overnight. I would say leave them about 20 minutes out of the oven before slicing. I like to put them in the fridge and them overnight before serving. They are best when totally cool.

I wanted to love this recipe, but actually didn’t have much luck with it. I made these brownies yesterday, with 70% vegan dark chocolate. Baked them for 28 minutes. Cooled for 25 minutes then cut. They were very sticky and difficult to cut. I then rested them in the fridge overnight. Today they is still very overly sticky (needed prying off the plate with a knife). They are also way too sweet for my taste. I ended up putting the cut squares (jagged as they were from their difficult cutting experience) back in the oven to bake for another 16 minutes at 180 degrees, and then cut them in half again, to make tiny little brownie bars, about 3×6 cm max. At this well cooked and super tiny size, they’re edible, although due to the sweetness, one tiny bar per day is more than enough. If I tried this recipe again I’d leave out the 70g light brown sugar, and bake them for at least 35 minutes, maybe more.
Sorry to hear you didn’t have much luck! A few questions: what chocolate did you use? In the notes I suggest Lindt dark chocolate and I note that I haven’t tested them with anything other than that. If you used a coconut oil based chocolate that would also alter the result.
Did you weigh the ingredients (particularly the light brown sugar?) This makes a huge difference in general baking success and could also account for excess sweetness. They are definitely sweet brownies but no sweeter than the average (and no sweeter than the non vegan ones that I make almost constantly).
As I’ve mentioned in the notes you really need to leave these to set and cool. They are purposefully fudgy brownies so I always recommend a few hours or even better, overnight in the fridge.
I found this recipe to be delicious and gooey and exactly how anyone would want a brownie to be. Absolutely no compromise with using plant-based ingredients, and it would rival any brownie out there! I actually used a quite rich 72% dark chocolate which I was concerned may make the brownie too rich but I found it balanced out the sweetness very well. Yes they were fudgy, and quite tricky to cut with a knife, but with some careful, patient cutting I got there, and that process gave me the indication that they were exactly the texture that a brownie should be- and they remained intact. One note I would say though is that I actually cooked them for 15-20 minutes rather than 30 as it was already cracked on the surface and cakey at the top and edges (This may simply be due to my cooker so time is probably approximate and subjective!). Loved the recipe, thanks for your hard work to create this!
Looking forward to making this recipe. It looks fabulous. My husband is allergic to almonds and hence almond meal, BUT I have found that pumpkin seed meal (although a little hard to find) is a pretty equal substitute. So I’m gonna try this recipe with the pumpkin seed meal. Fingers crossed! 🙂